
This step by step tutorial shows you how to quickly & easily create a banner with countdown timer and add it before your header using any WordPress theme.
Requires the use of the FREE Countdown Banner plugin by WP SITES.
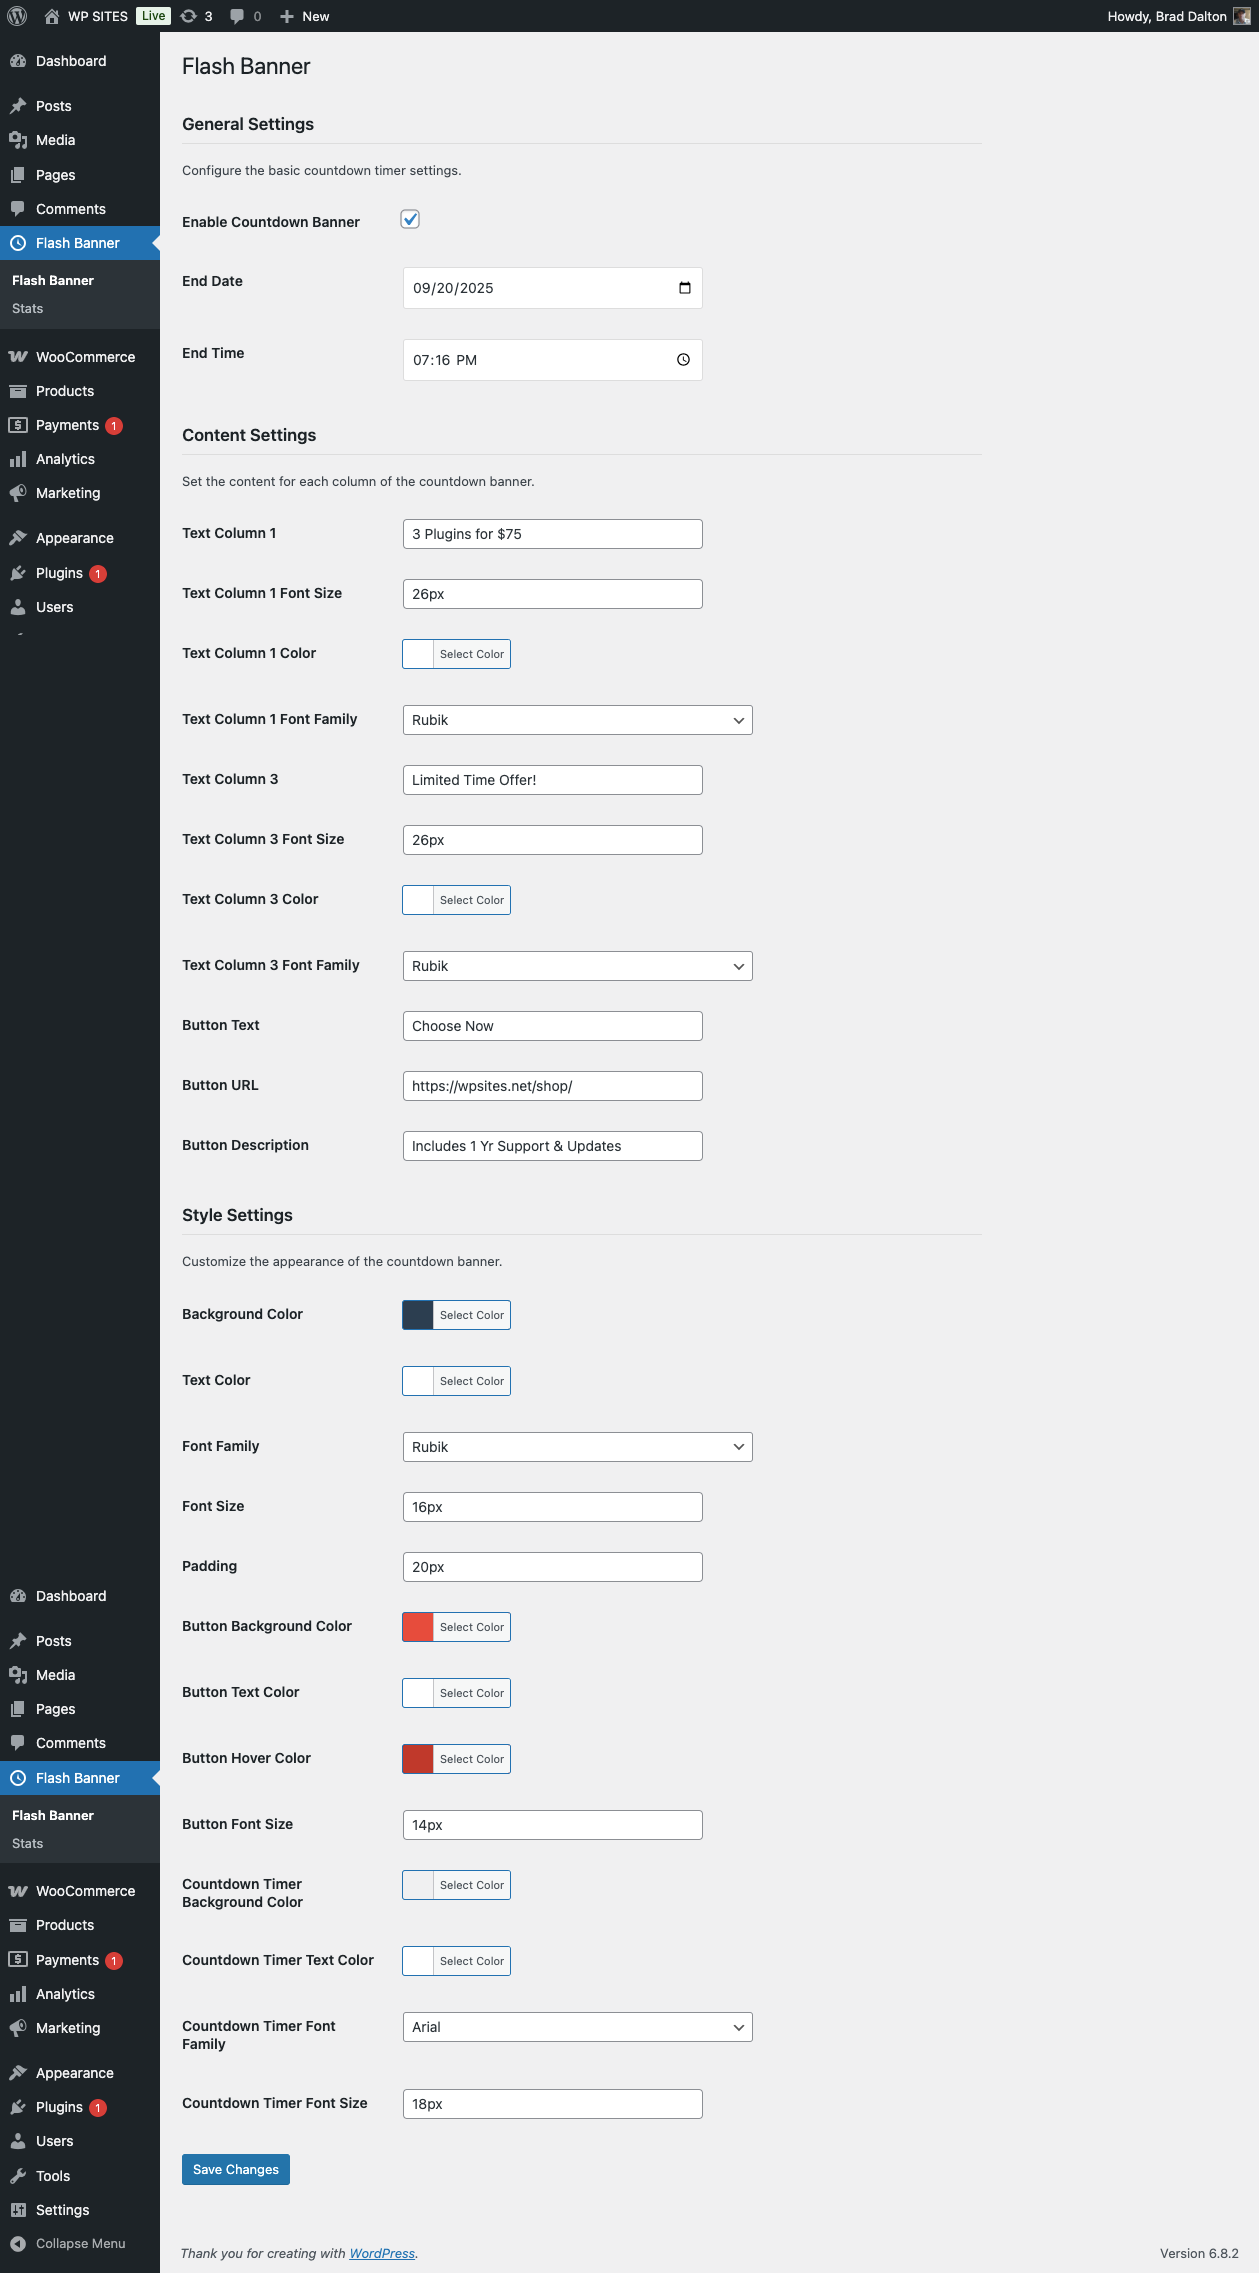
STEP 1 : TURN ON YOUR BANNER
- Go to your website’s admin area ( dashboard )
- Look for “Flash Banner” in the menu (it has a clock icon)
- Click on it
- Find the box that says “Enable Banner” and check it
- Click “Save Changes”
STEP 2 : PICK WHEN YOUR SALE ENDS
- Find “End Date” – this is when your sale stops
- Click the calendar and pick a date
- Find “End Time” – this is what time your sale stops
- Pick the time (like 11:59 PM)
- Click “Save Changes”
STEP 3 : WRITE YOUR MESSAGE
- Find “Text Column 1” – this is your first message
Example: “HUGE SALE!” - Find “Text Column 3” – this is your second message
Example: “Don’t miss out!” - Click “Save Changes”
STEP 4 : MAKE YOUR BUTTON
- Find “Button Text” – this is what your button says
Example: “Shop Now” - Find “Button URL” – this is where people go when they click
Example: https://yoursite.com/shop - Find “Button Description” – this is the small text above the button
Example: “Click here to save money!” - Click “Save Changes”
STEP 5 : MAKE IT PRETTY
- Find “Background Color” – this is the color behind everything
Click the color box and pick a color - Find “Text Color” – this is the color of your words
Click the color box and pick a color - Find “Font Size” – this makes your words bigger or smaller
Example: 16px - Click “Save Changes”
STEP 6 : STYLE YOUR BUTTON
- Find “Button Background Color” – this is the button’s color
Click the color box and pick a color - Find “Button Text Color” – this is the color of the button’s words
Click the color box and pick a color - Find “Button Font Size” – this makes the button words bigger or smaller
Example: 14px - Click “Save Changes”
STEP 7 : STYLE YOUR TEXT COLUMNS
For your first message (Text Column 1):
- Find “Text Column 1 Font Size” – make the words bigger or smaller
- Find “Text Column 1 Color” – pick the color of the words
- Find “Text Column 1 Font Family” – pick what the words look like
For your second message (Text Column 3):
- Find “Text Column 3 Font Size” – make the words bigger or smaller
- Find “Text Column 3 Color” – pick the color of the words
- Find “Text Column 3 Font Family” – pick what the words look like
Click “Save Changes” after each change!
STEP 8 : STYLE YOUR COUNTDOWN TIMER
- Find “Countdown Background Color” – the color behind the timer
- Find “Countdown Text Color” – the color of the timer numbers
- Find “Countdown Font Family” – what the timer numbers look like
- Find “Countdown Font Size” – how big the timer numbers are
- Click “Save Changes”
STEP 9 : CHECK YOUR BANNER
- Go to your website’s front page
- Look at the top – you should see your banner!
- If you don’t see it, make sure:
- The banner is enabled (Step 1)
- You picked an end date and time (Step 2)
- The end date is in the future
STEP 10 : WATCH YOUR STATS
- Go back to “Flash Banner” menu
- Click “Stats”
- See how many people clicked your button!
- The green bars show faily clicks
Was this helpful?
Thanks for your feedback!
Leave a Reply
You must be logged in to post a comment.