
This simple step by step tutorial shows you how to setup the quantity slider plugin for WooCommerce and transform your quantity number field to a slider.
Step 1: Go to Your Single Product Page
- Open WordPress admin
- Click “Products”
- Find your product and click “Edit”
Step 2: Turn On the Slider
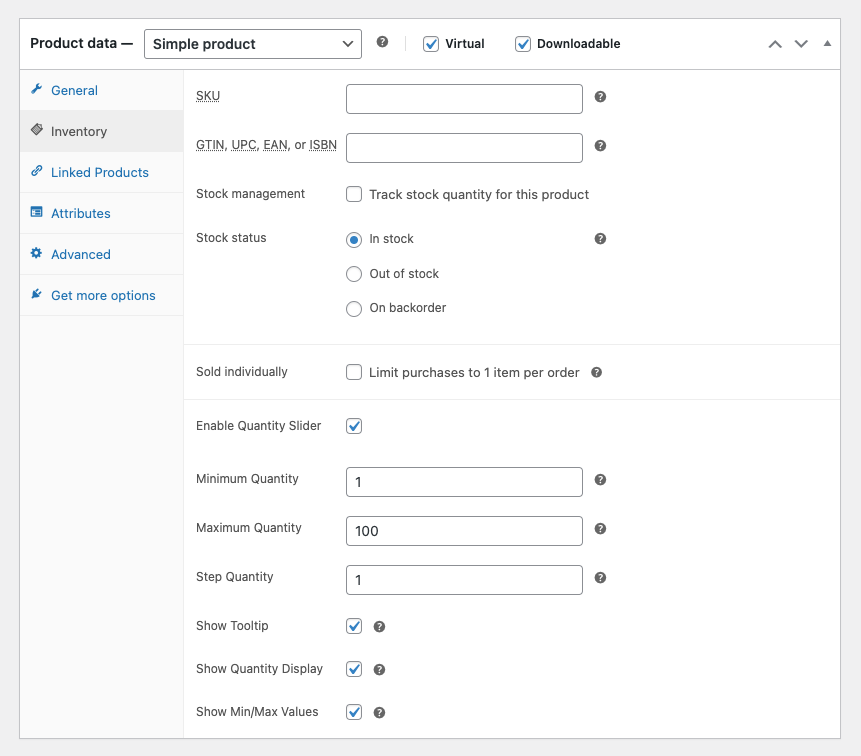
- Scroll down to “Product Data”
- Click the “Inventory” tab
- Look for “Enable Quantity Slider”
- Check the box to turn it on
Step 3: Set Your Numbers
- Minimum Quantity: The smallest number someone can buy (like 1)
- Maximum Quantity: The biggest number someone can buy (like 100)
- Step Quantity: How much the number jumps (like 1, 2, 5, or 10)
Step 4: Select Your Options
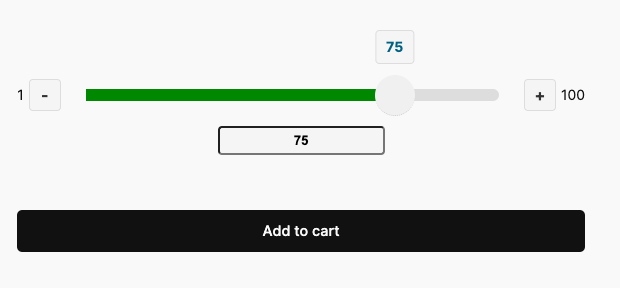
- Show Tooltip: Shows the number when you hover over the slider
- Show Quantity Display: Shows the number below the slider
- Show Min/Max Values: Shows the smallest and biggest numbers above the buttons
Step 5: Save Your Settings
- Click “Update” button
- Go to your website and look at your product page
- You will now see a slider instead of a number field
Here’s an example of the single product settings page the quantity slider plugin adds when the plugin is installed.
Related Products
Was this helpful?
Thanks for your feedback!
Leave a Reply
You must be logged in to post a comment.