
This is a beginners guide to setting up taxes using WooCommerce. There’s 3 main steps you need to take to calculate tax for products at checkout :
- Enable Taxes
- Configure Tax Options
- Add Taxes
Enable Taxes
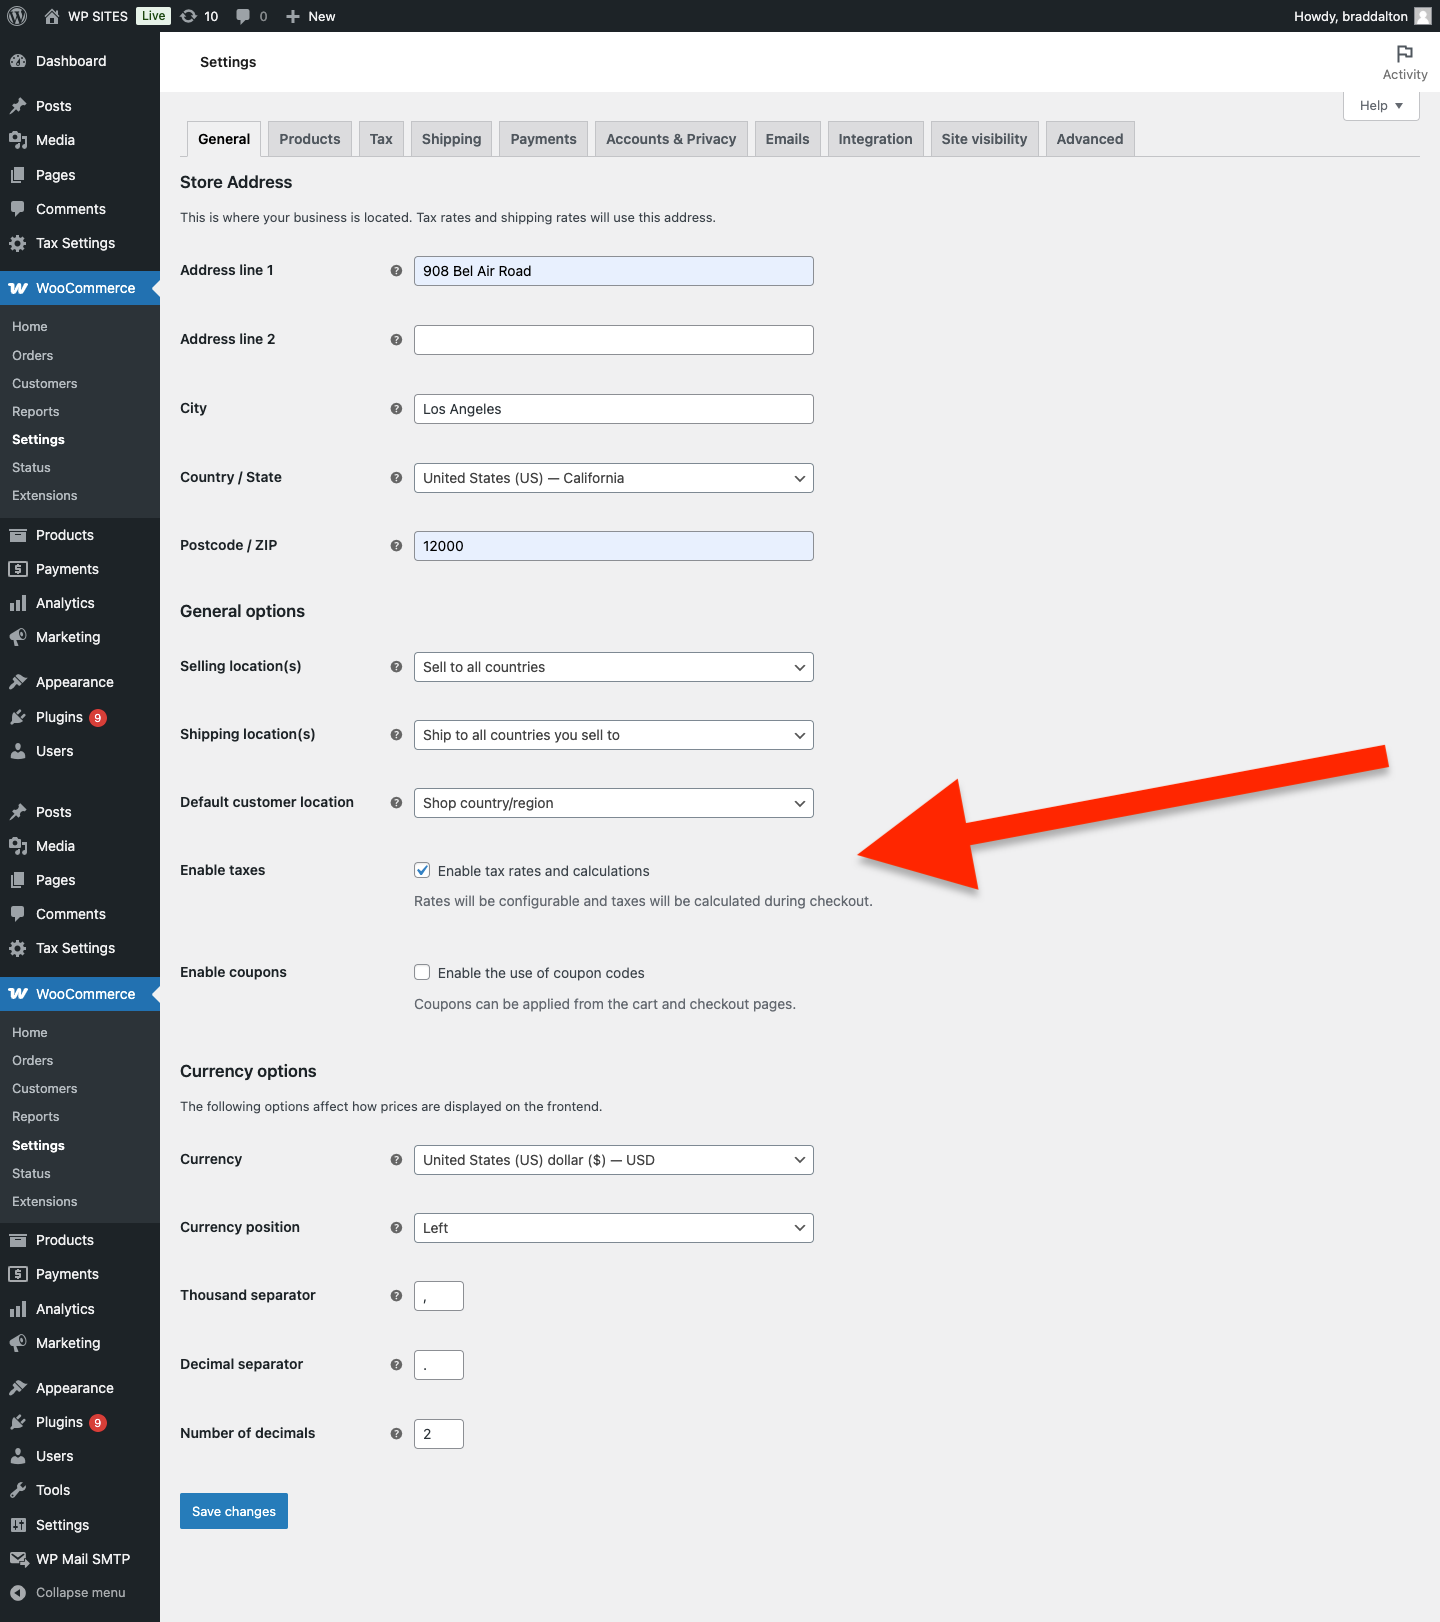
To enable tax, from your WordPress Dashboard, go to WooCommerce > Settings > General > Enable taxes > Enable tax rates and calculations.
Here’s a screenshot from the WordPress Dashboard. Click to enlarge.
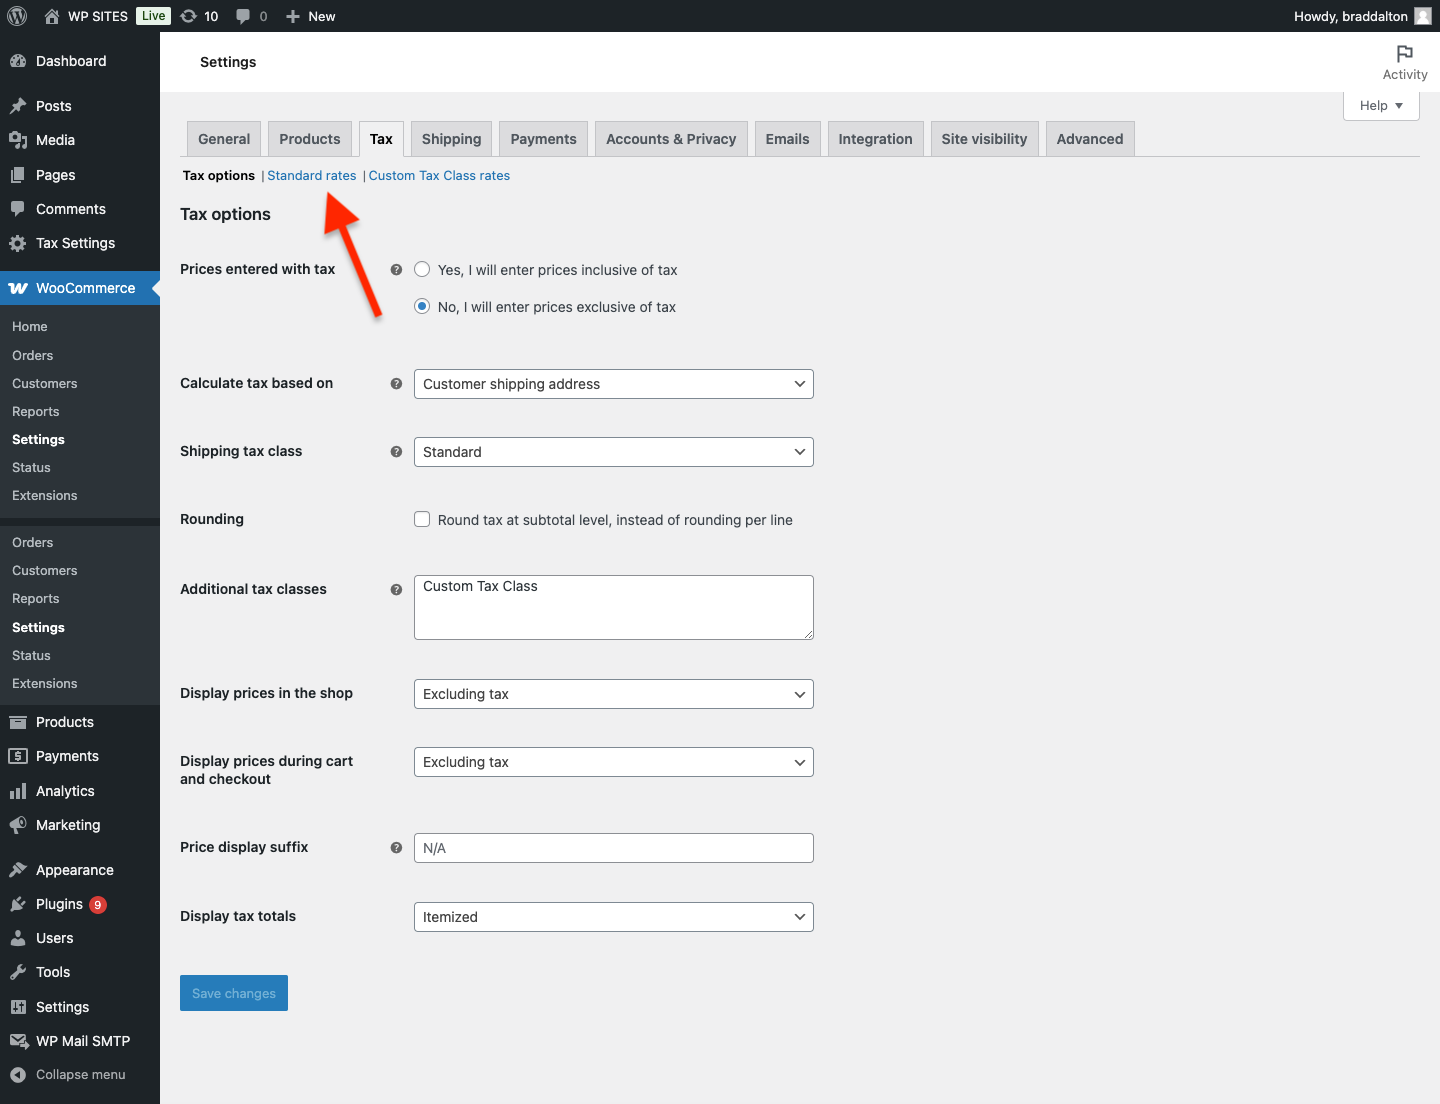
Configure Tax Options
Once you have enables taxes, a new tab named tax will appear which you can click on to select tax options which you’ll need to configure based on your own individual preferences.
Add Taxes
Once you have saved your tax options, you can click on Standard Rates and add different taxes by country code, state code, zip code and city.
You can :
- Add taxes by percentage
- Add a custom name for each tax
- Add a priority for each tax
- Choose to compound the rate for each tax
- Choose to apply the tax to the shipping for each tax
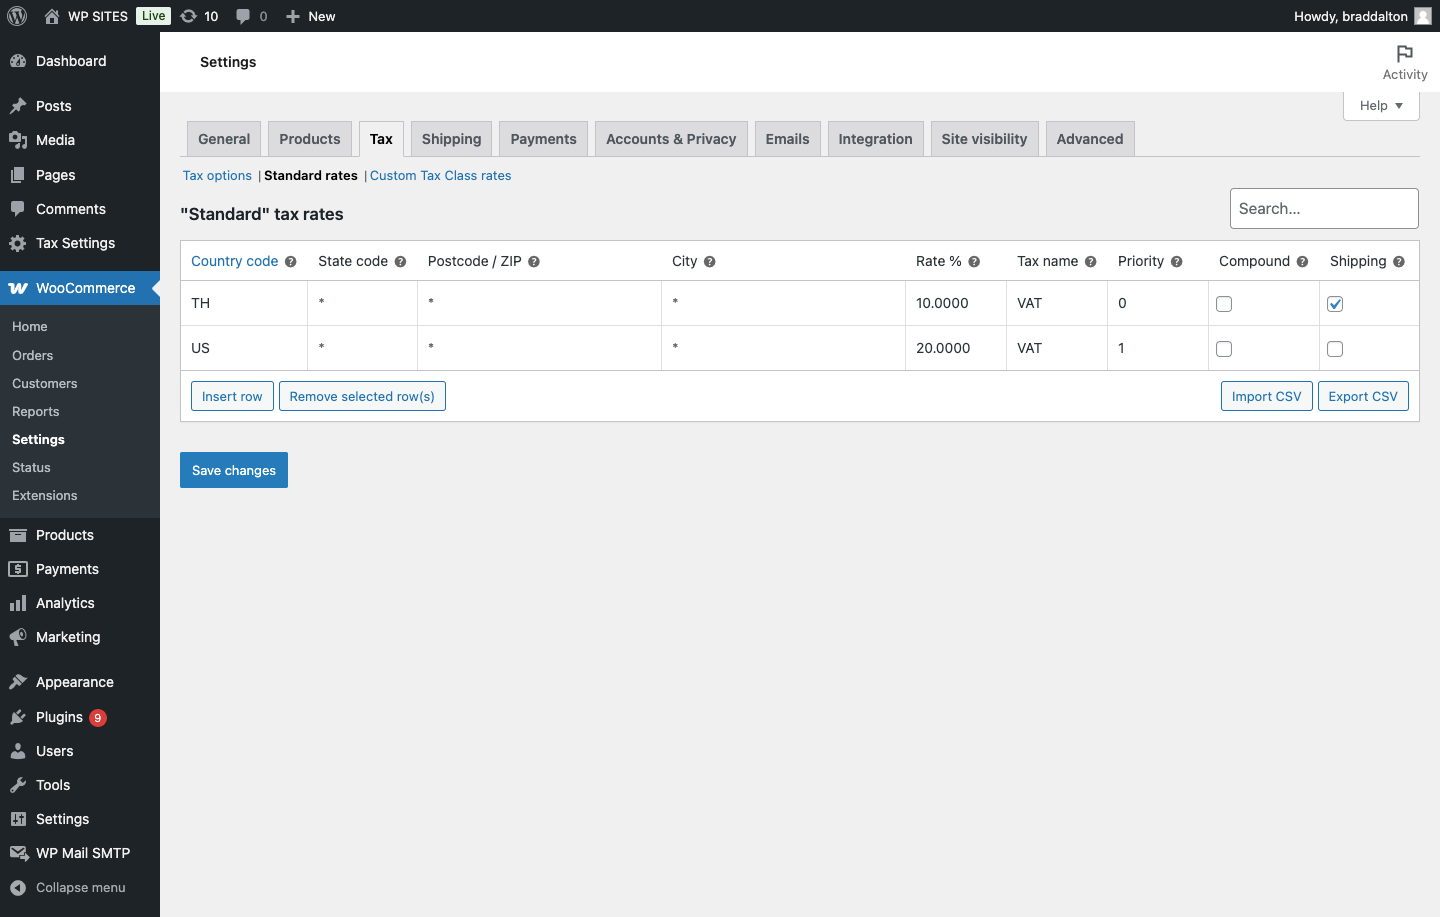
In this example, we add VAT ( Value Added Tax ) for 2 countries only.
Configuring & adding taxes is something that will vary based on individual requirements.
If you’d like us to setup and configure taxes for you, please book a consultation or contact us for more details.
Related Solutions
- Tax Exclusion
- Duty VAT & Tax Fields for Checkout Block in WooCommerce
- Display Price Including Tax in WooCommerce
- Display Table of Taxes on Customer Order emails for WooCommerce
- COGS Tax On Profit Margin
- Different Tax for New & 2nd Hand Products Using WooCommerce
- How To Change The Tax Rate Based on User Role in WooCommerce
Get The Tutorials You Need Delivered When You Want
Leave a Reply
You must be logged in to post a comment.