
You can style each menu item using the item i.d which you’ll find in the source code or by using CSS classes.
Screen Options
Go to Appearance > Menus > Screen Options
Under the Show Advanced Menu Properties, check the CSS Classes.

Menu Item CSS Classes
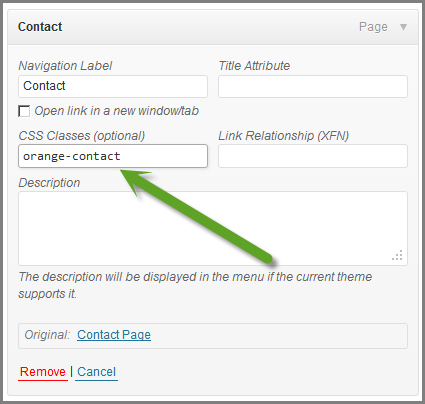
Open each menu item and add a unique name for that menu items class.
Styling Menu Item Classes
You can then use your unique custom class for each menu item for styling.
Here’s what it will look like in the source code:
class="orange-contact menu-item menu-item-type-post_type menu-item-object-page menu-item-37268Add CSS
Changes the color of text for the menu item to red.
.orange-contact { color: #80000;}Changes the background color of the menu item to yellow.
.orange-contact { background-color: yellow;}Changes the color of the menu items text to red only when hovered over.
.orange-contact a:hover {
background-color:red;
}
Changes the text color to orange and the background color of the menu item to black when hovered.
.orange-contact a:hover {
color:orange;
background-color:black;
}
CSS Basics
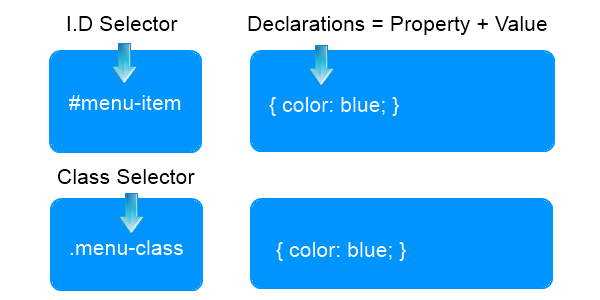
Class & I.D Selectors
You can also style nav menu items using the unique i.d for each menu item.
CSS class selectors always start with”.” dot and i.d selectors always start with “#”.
Sample code for using menu item i.d.
Example: #menu-item-1 { color: red; }Sample code of using custom css classes.
Example: .menu-class-name { color: red; }
Was This Tutorial Helpful?