Secure WordPress is one of the most popular WordPress security plugins. Its very easy to use as all you need to do to configure the settings is check the boxes and save the changes.
You’ll then need to open an account with Website Defender and upload a verification file to your root directory on your server.
Its crucial to secure your WordPress installation from hackers by finding out which files hackers can exploit which this plugin alerts you to after scanning your WordPress installation.
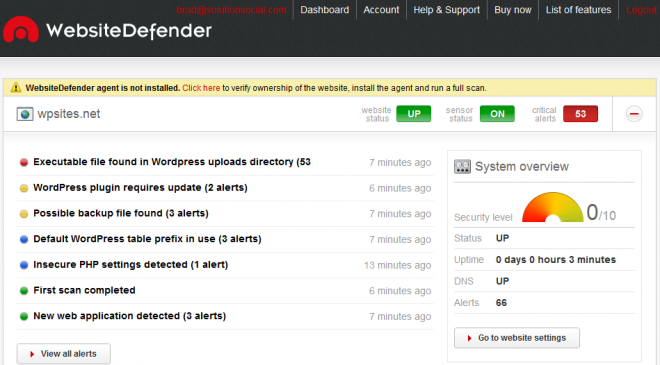
I’ve just installed the plugin and set it up after creating a free account with Website Defender.
Once you’ve installed and activated the Secure WordPress plugin, go to the settings page and select which security measures you want to enable for your WordPress installation under the Configuration module.
Click Save and you’re done with the configuration settings.
Here’s the configuration settings i’m referring to in the screenshot below.
You’ll also notice 3 red buttons on the right hand side of the configuration module.
These red buttons will turn green once you have created an account with WebsiteDefender and uploaded the user agent file to the root directory on your server for verification purposes.
Here’s an image of what i mean below.
Alerts
Under the alerts tab in your Website Defender account you’ll find the different types of security alerts.
Click on each alert link to take a closer look at the different alerts.
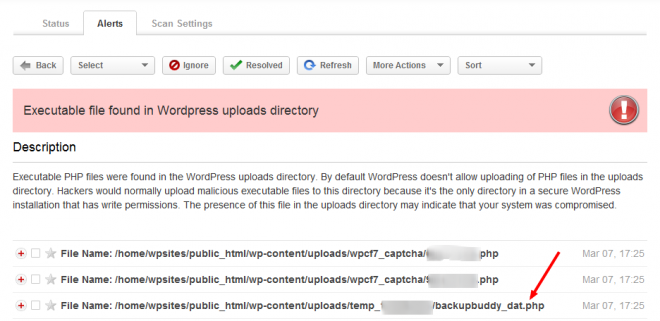
After clicking on the first link, Executable file found in WordPress uploads directory.
you’ll find that many of the critical security risks come from your /public_html/wp-content/uploads/ folder
Here you’ll find temp files and uploads which you may no longer need.
To be on the safe side you can compress them and then download the zipped files using File manager in cPanel or FTP, otherwise you’ll have a copy of these in your full backup which i suggested you take before using this plugin.
Once you’re covered, delete the file’s which pose a security risk from your server.
After deleting the files from your server, you can check the box next to the file you’ve deleted and then mark the files as Resolved.
The reason these php files are displayed as a security alert is because WordPress doesn’t allow uploading of php files in the uploads directory which is the only directory in WordPress with write file permissions.
Other Security Alerts
You also find the Secure WordPress plugin alerts screen displays:
- Plugins which need updating
- Backups that need deleting off your server after being downloaded
- Multiple WordPress installations detected which may be for sub domains or sub directories
Analyze the contents of the files. If the file is malicious, delete it immediately from your system!
Status
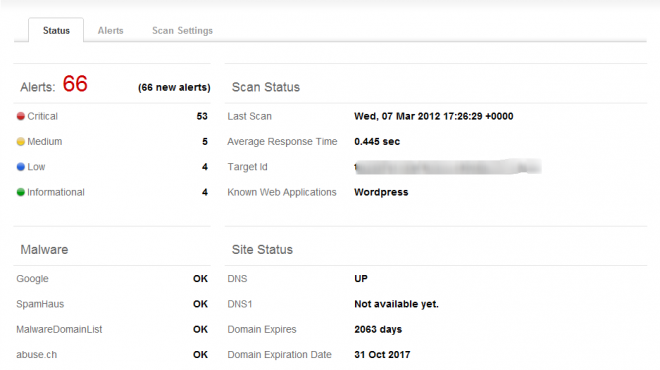
The status tab displays Alerts, Malware, Site Status and Scan Status.
Here you can click on the Critical link and deal with each file as discussed above.
Scan Settings
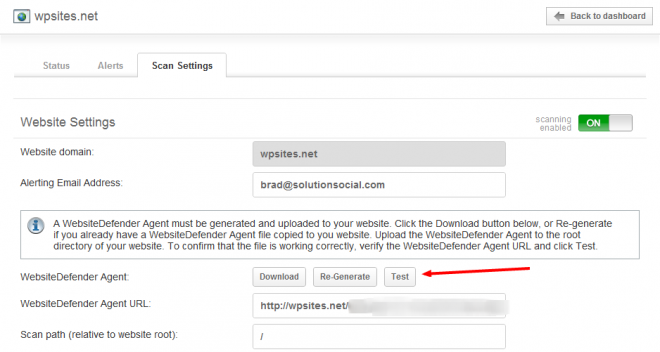
The scan settings is where you can download the user agent php file and upload it to the root directory on your server. Click the Test button to verify the file is working correctly.
Conclusion
Secure WordPress has been downloaded over 600,000 times and is very easy to use.
Its a great plugin for detecting malware and cleaning up files which may pose a security risk on your server.
Have you used this plugin? Do you know of any WordPress security plugins which are similar?


Leave a Reply
You must be logged in to post a comment.