
This tutorial provides 4 different methods which enable you to add a background image behind your text content on single pages.
Based on the following question from a member of the Genesis community :
Hoping for quick fix. need to add image to only pages. the image has to go behind text, not background. can I do this easily? thanks in advance!
Yes you can do this easily using pure CSS like this :
.page-template-default .content .entry {
    background-image: url('images/bg.jpg');
}
However, the above CSS adds the same image to all single pages. What if you want to use a different image and also change the font color based on the colors in the image?
Firstly, here’s the demo video :
Demo Video
The demo video shows how you can add a unique background image and change the font color on any single page. It also shows how you can do this using ACF or WordPress custom fields. it also shows how a default background image is added when none added.
In this tutorial, you’ll find several solutions which enable you to do the following :
- Add a background image to the same div using pure CSS
- Add a different background image using WordPress ( Native ) custom fields
- Add a different background image using the ACF plugin
- Change the default font color using WordPress ( Native ) custom fields
- Change the default color using radio buttons or check boxes using the ACF plugin
- Set a default background image via the WordPress customizer
Basically, the solution is coded to work even if the ACF plugin is inactive so that you can still edit or add background images and change the text color using the custom field meta boxes native to WordPress.
Note : By default, this solution is coded to add background images behind the text in the content area of single pages only however you can easily modify this by changing the conditional tags and div classes in the code. Modification of PHP code is supported for logged in members.
Code Installation
Solution 1 – From the members only download folder below, copy the PHP code named Solution 1 from the functions.php file to the end of your child themes functions.php file and copy the CSS named Solution 1 from the style.css file to your child themes style.css file and clear caching.
Solution 2 – From the members only download folder below, copy the PHP code named Solution 2 from the functions.php file to the end of your child themes functions.php file and upload the folder named bg to your child themes root directory. You can then upload a default image named bg.jpg to your child themes images folder and change the background image via the WordPress customizer.
Solution 3
Step 1 : From the members only download folder below, copy the PHP code named Solution 3 from the functions.php file to the end of your child themes functions.php file and upload the folder named bg to your child themes root directory.
Step 2 : You can then upload a default image named bg.jpg to your child themes images folder and change the background image via the WordPress customizer.
Step 3 : Add the CSS from the style.css file to the end of your child themes style.css file and clear caching.
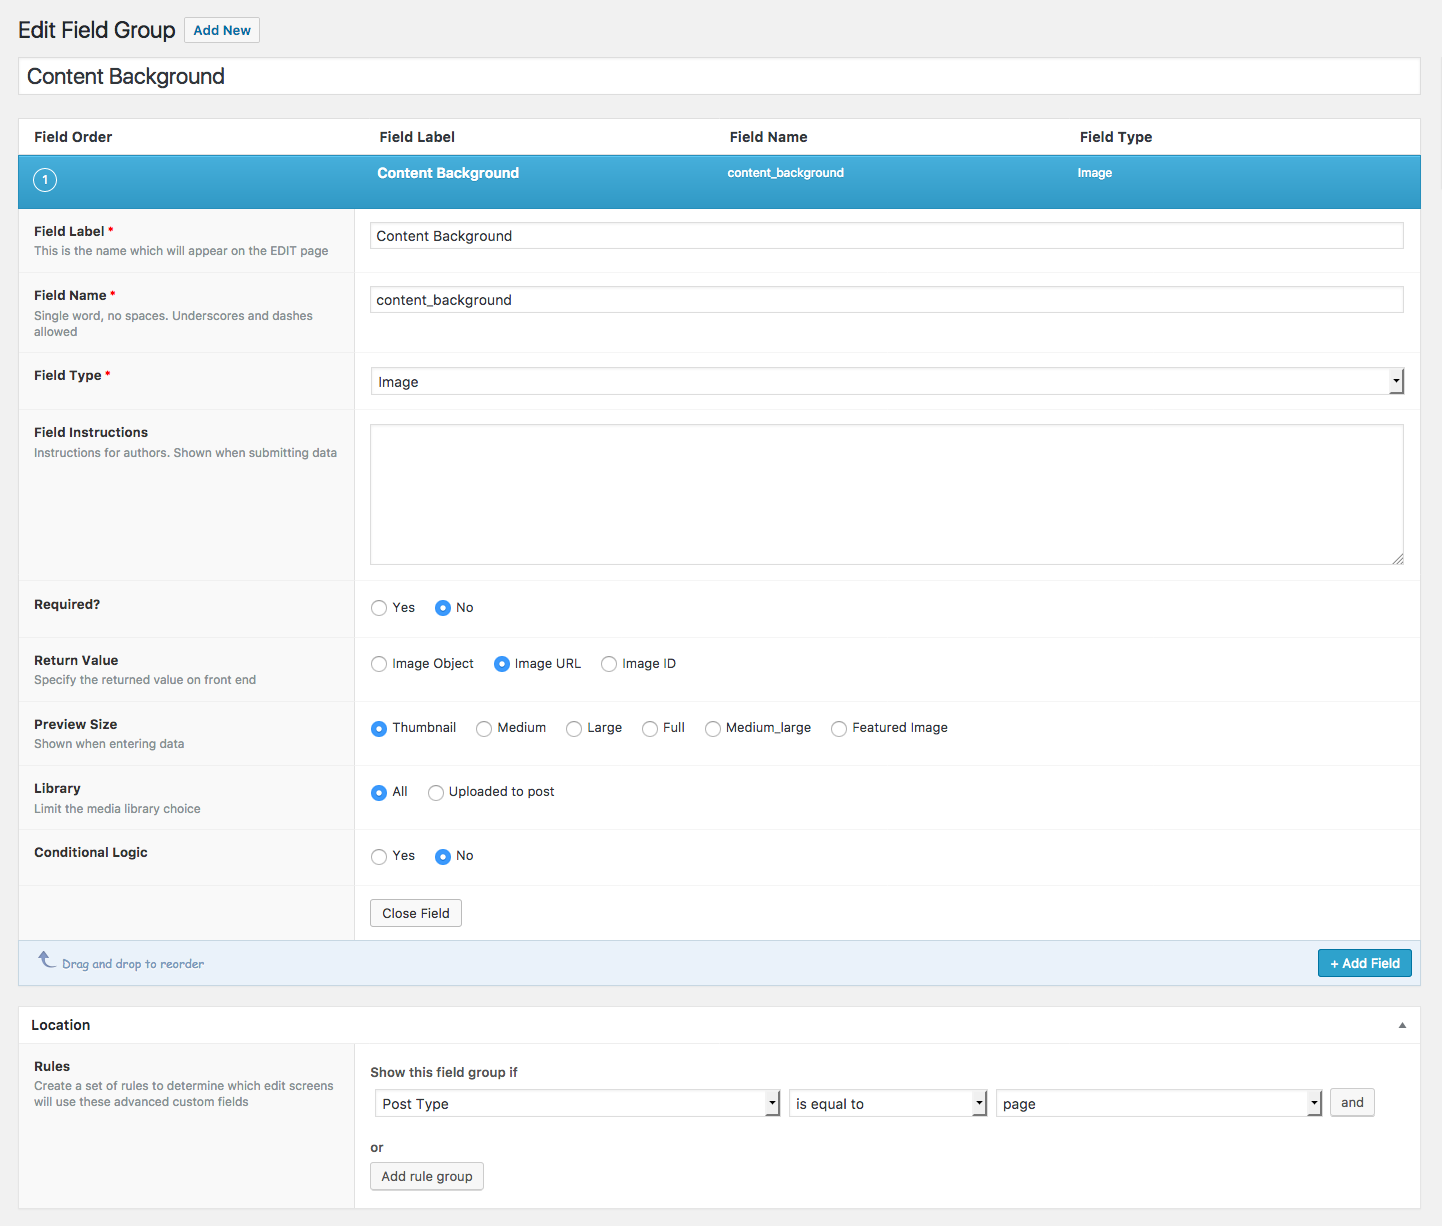
Step 4 : Install the ACF plugin and create 2 new fields named text_color and content_background using the following screenshots as a guide to how to configure the field settings for each :
ACF text_color field settings :

ACF content_background field settings :
Prefer using WordPress custom fields rather than ACF? You can add your background image and change the text color using WP custom fields like this :

Here’s the download folder for logged in members :
Leave a Reply
You must be logged in to post a comment.