
There’s several different ways you can add columns to your website.
- You can create a new widget area and use CSS with HTML to generate new columns.
- You can create new widgets side by side which is a bit more challenging if you’re not a coder.
- You could use a custom grid loop and tweak the CSS to display your posts in columns.
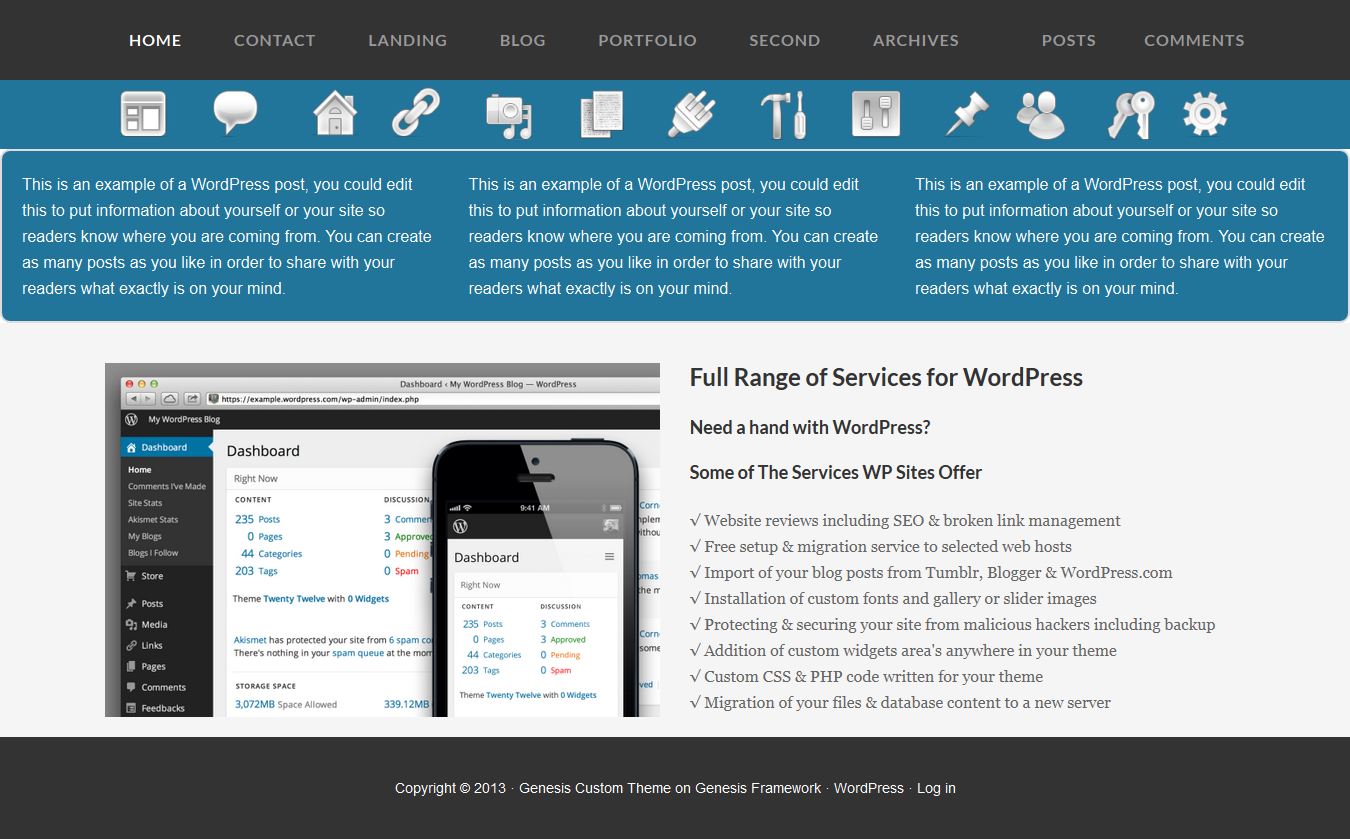
In this tutorial, we’ll use the first method as its the easiest to create something like this:

In 3 simple steps, using the code below, you’ll be able to quickly and easily:
- Register a new widget
- Position the widget so it displays your content in any theme location
- Add 2,3,4,5 or 6 columns side by side across your site.
On top of this, you’ll also be able to determine which pages and posts your columns display on and which they don’t.
Register & Position Widget
Add this code to your child themes functions.php file.
This code will create a new widget area and only display the content you place in that widget, on your home page.
We’ll take a look at how to easily modify this code so it displays your content on other pages later on in the tutorial.
Add Content Column CSS
Add the first code block to your child themes style.css file.
This code comes included in most StudioPress themes.
Add Content Column HTML To Text Widget
Now you can simply choose how many columns you want to generate and choose the HTML for the amount of columns you want to generate.
Simply paste the HTML for your columns into a new text widget and drag that widget into your new widget area.
Here’s the HTML which creates 3 columns.
Changing Position Of Columns
You can easily change the position your columns display, by changing the hook included in the PHP function.
Here’s a map displaying genesis hooks you can replace in the code to change the location your content columns display in your theme.
Here’s an example of the code which needs to be changed using a different hook on line 10.
Change from genesis before content sidebar wrap
to genesis header
Once you change this line of code and replace the hook, it will display your widget content on the new hook position. In this example, that’s the header of a Genesis theme.
Here’s exactly what the new PHP code will look like after changing the hook to genesis_header.
You can clearly see the hook has been changes from genesis_after_content_sidebar_wrap to genesis_header.
Check out the visual map to see all the different hooks you can use in any Genesis child theme.
Important Hook Changes
The latest Genesis update now includes support for HTML 5.
If you have updated to Genesis 2.0 and added HTML 5 to your child theme, some of the hooks have changed.
Learn more about the new HTML 5 hooks in Genesis.
Display Content Columns On Specific Pages
You can easily change the pages or posts where your columns display.
Its simply a matter of using one of the many conditional tags in the PHP code.
Here’s an example:
The code we use above on line 12 uses the is_home conditional tag.
This means, the content of the widget only displays on the home page. To change where the content of the widget displays, we’ll change the conditional tag from is_home to is_single.
The is_single conditional tag will only display the widget content on single posts. Not the home page or anywhere else.
Change conditional tag for the home page is_home
to single posts is_single
Your widget will now only display content on single posts.
Here’s the full PHP code for displaying widget content on single posts only.
Styling
You will need to add some CSS code to your child themes style.css file.
Here’s some very basic CSS you can add to and modify to suit your own styling preferences.
You can also style content columns by adding a new class in the HTML.
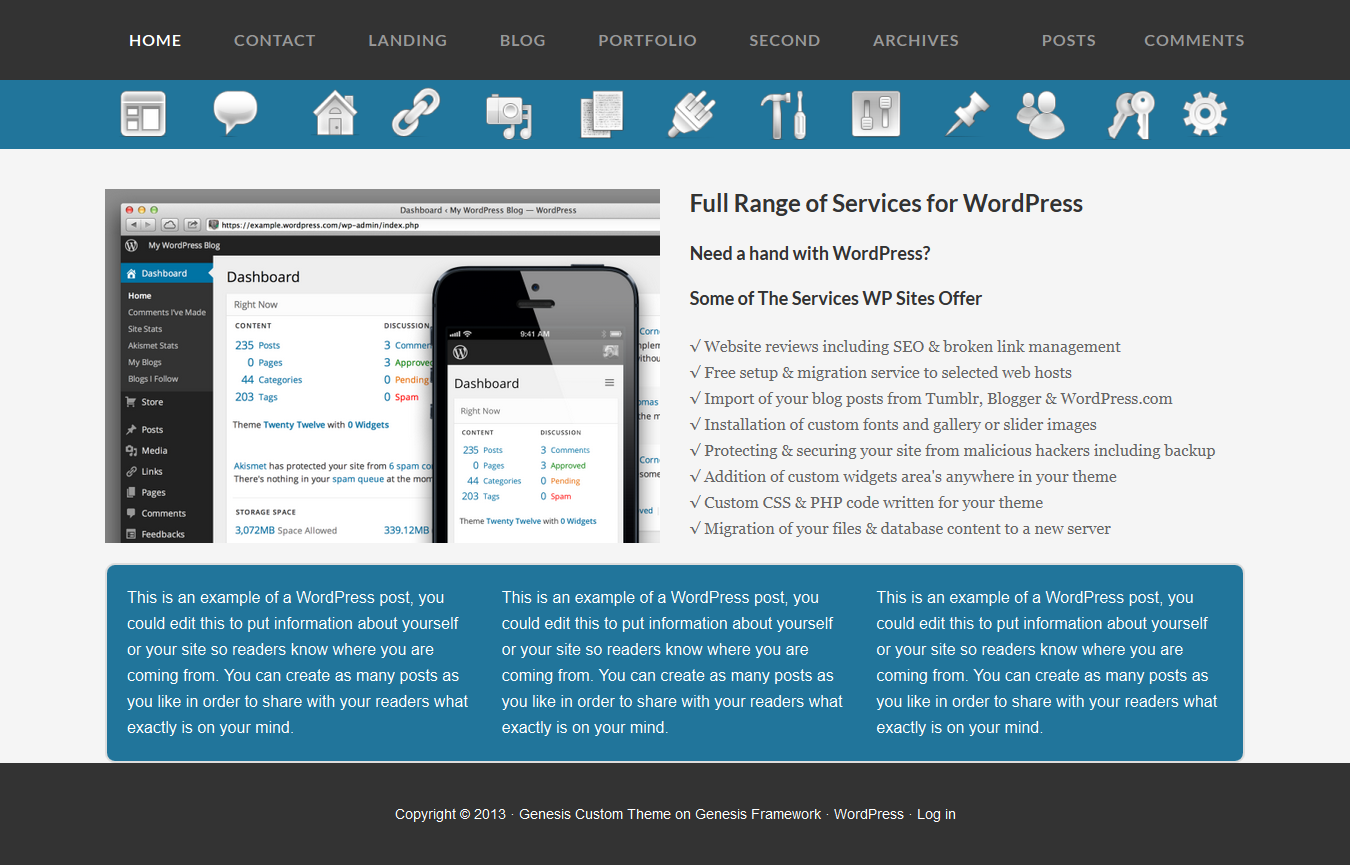
Drum Roll!
Here’s 3 screenshots of what you can achieve using the code i wrote & tested for you above.
Please click any image to start the gallery carousel.

Pro Tip
Want to get real efficient and style your widgets all the same?
Simple use the same class in your new custom widget as you use to style other widgets!
No need to add any CSS in this case.
Here’s an example of using the CSS class for your footer to style your columns in a widget.
Note: This code uses the new HTML 5 hook genesis_after_entry and will only work if your child theme supports HTML 5.
Useful Resources
- Add content columns in custom functions
- How to add content columns in WordPress
- Split Widgets 50/50 Side by Side
How about you?
Got any tips on how to easily create custom widget area’s or content columns in WordPress?
Leave a Reply
You must be logged in to post a comment.