
In this beginners guide, i’ll take you step by step through the basics of adding either a full width header image or partial width logo to the generate theme by StudioPress.
I’ll also show you how to add images which are different heights and widths as well as aligning an image in the header right widget of this theme.
The default dimensions for this themes header are: 960px width by 100px height.
If your image is taller, you will need to make some simple code changes (which i will make super easy) in your child themes style.css file.
Firstly, lets takes the easy road.
Here’s what the default logo looks like out of the box.
![]()
The above default logo only displays if your header settings are set to display an image logo.
If they are set to display text, then your logo will not display and your site title & description from your Settings > General will display instead. Here’s what the text looks like:
Genesis > Theme Settings > Header
If you go to your theme settings, you’ll find these options in the drop down menu:

Lets simply remove the default logo and upload a logo.png file to the child themes images folder which is 450px width by 100px height:
![]()
Cool! Works perfectly and fits just fine. Even works fine when populating the header right widget with a search box:
![]()
But how about adding a full width header image?

Also works perfectly as long as the image is named logo and uses a .png file extension as well as being 100px in height.
But what if your logo or header image is taller and you want to display an image in the header right widget or even put a search box in there?

Your image gets cut off if you put anything in the right widget unless you only add a logo which is 450px width or less.
This problem can only be fixed by editing the CSS code in your child themes style.css file which i’ll make easy for you.
Changing Header Height
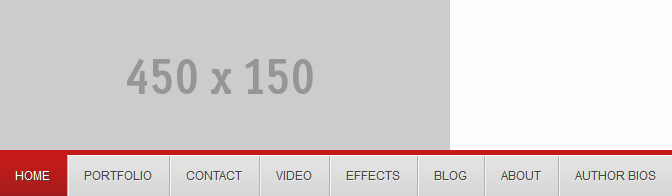
Firstly, lets upload an image logo which is 150px height & 450px width.
![]()
Its cutoff at the bottom so we”ll make 2 simple changes to the CSS code in the child themes style.css file on Lines 177
#header {
	background: url(images/bg-header.png);
	border-bottom: 5px solid #c61a1a;
	min-height: 150px;
}
The min-height value has been changed from 100px to 150px
And on Line 232 we’ve changed the height value from 100px to 150px also:
.header-image #title-area,
.header-image #title,
.header-image #title a {
	display: block;
	float: left;
	height: 150px;
	overflow: hidden;
	padding: 0;
	text-indent: -9999px;
	width: 450px;
}
Note: its best practice to copy the original CSS rules and paste them at the end of your file before making the changes. This way you can easily find any modifications you’ve made to the default code in your child theme.
Here’s the result:
But what if your header image is 960px X 150px?. Here’s what happens:

To fix this, simply change the value for the width in the CSS code on Line 236 from 450px to 960px.
.header-image #title-area,
.header-image #title,
.header-image #title a {
	display: block;
	float: left;
	height: 150px;
	overflow: hidden;
	padding: 0;
	text-indent: -9999px;
	width: 960px;
}
And here’s the result:

Works perfectly.
Adding Image To Header Right Widget
But how about if you want to use the header right widget for displaying another image next to your logo?
If you simply add the HTML for the image in a text widget in your header right widget area, this is what it will look like:

It needs aligning which you can do easily by using CSS code in your child themes style.css file.
Simply change the value for the padding on Line 215 from 15px to 0.
#header .widget-area {
	float: right;
	padding: 0px 0 0;
	width: 450px;
}
You can also change the value for the width from 500px to something a bit smaller to bring your image inline with other elements of your site.
Here’s the result with perfect alignment:

I know there’s many more modifications you can do with header images and logo’s however these tips should give you a good idea on how the basics work for most StudioPress child themes.
Important Stuff To Remember
1. You’ll find its far easier to find and manage modifications to your CSS code if you copy the entire rule and paste it at the end of the file before making any changes.
Here’s all the code i copied from its original location in the file and changed at the end of the file without changing any code in its original position in the file:
/* Header Customization
------------------------------------------------------------ */

#header {
	background: url(images/bg-header.png);
	border-bottom: 5px solid #c61a1a;
	min-height: 150px;
}

.header-image #title-area,
.header-image #title,
.header-image #title a {
	display: block;
	float: left;
	height: 150px;
	overflow: hidden;
	padding: 0;
	text-indent: -9999px;
	width: 450px;
}

#header .widget-area {
	float: right;
	padding: 0px 0 0;
	width: 450px;
}
2. Any images you upload to your child themes images folder need to be in .png file format and be named logo or they will not display as the default code on Line 223 uses this path, file name and extension.
Here’s the default code for the default logo image.
.header-image #header #title-area {
	background: url(images/logo.png) left top no-repeat;
}
Leave a Reply
You must be logged in to post a comment.