
The code in this tutorial enables you to display a grid using the foreach loop with the existing CSS for column classes already included in Genesis.
Normally you need to filter the post class and use the built into wp_query counter with different types of PHP operators to do this. In this case, you can’t use that method because there’s no $wp_query so you need a different solution.
This solution uses a increment operator with a Modulus % operator and a equal == comparison operator. These PHP operators enable you to add the first column class to the first entry in the 1st column on every row and also add the one-fourth class to all entries.
This 1st example, assumes you want to display a grid of entries in 4 columns.
HTML Output
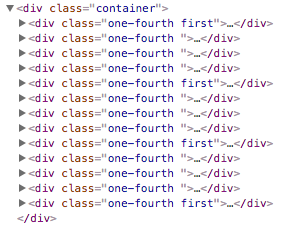
Here’s the HTML output the PHP code generates which shows how the classes have been added to each entry using the code from this tutorial :
The solution only requires around 10 characters of code which does the math to work out which classes are added to which entries so they display in 2, 3, 4 or 6 columns.
Front End
Here’s what the HTML source generates on the front end after the browser loads the CSS for column classes :

Basically, this solution enables you to create a responsive grid using PHP code without the need to add CSS.
Before we take a look at the PHP, lets view the demo video which shows you how the code produces exactly the same result thats achieved when using the post class method and wp_query, with a lot less code.
PHP Code
Here’s the PHP code which enables you to display entries in 2, 3, 4 & 6 columns :
Leave a Reply
You must be logged in to post a comment.