
WordPress now includes a site identity setting in the customizer which enables you to add a custom logo and site icon.
This new setting is in addition to the existing custom header setting which also enables you to add a header image or logo to your themes header. In this tutorial, you’ll learn how to use the new custom logo setting to add your logo or site title & description.
Once you add the code below to your child themes functions file, you can then choose to use Dynamic Text or Image Logo.
Using Title & Description
You must remove the image & add the text for your title & tagline.
Also, select the correct settings from: Use for site title/logo: Dynamic Text
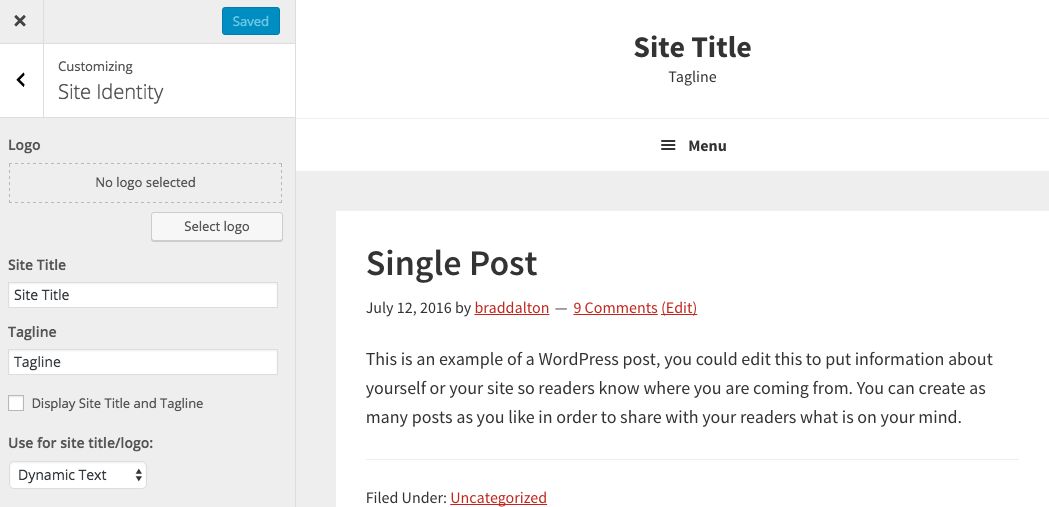
Using Image
You must add your logo. There’s no need to remove the text.
Also, select the correct settings from: Use for site title/logo: Image Logo
![]()
Note : Support is not yet built into Genesis for the custom-logo function unlike support for customer-header which is currently a better solution.
Here’s the code for logged in members:
Step 1 : The Input – Add the following code to your functions file:
//* Add support for custom logo
add_theme_support( 'custom-logo', array(
	'width'           => 300,
	'height'          => 90,
	'header-selector' => '.site-title a',
	'header-text'     => true,
	'flex-height'     => true,
) );
If your theme includes code like the above for adding theme support a custom-header, you can remove that code or simply change the name in the code from custom-header to custom-logo.
Step 2 : The Output – Add the following code to your functions file:
add_filter( 'genesis_seo_title', 'add_logo_to_title' );

function add_logo_to_title( $title ) {

    $inside = sprintf( '<a href="%s">%s</a>', trailingslashit( home_url() ), the_custom_logo() );

     //* Determine which wrapping tags to use
	$wrap = genesis_is_root_page() && 'title' === genesis_get_seo_option( 'home_h1_on' ) ? 'h1' : 'p';

	//* A little fallback, in case an SEO plugin is active
	$wrap = genesis_is_root_page() && ! genesis_get_seo_option( 'home_h1_on' ) ? 'h1' : $wrap;

	//* Wrap homepage site title in p tags if static front page
	$wrap = is_front_page() && ! is_home() ? 'p' : $wrap;

	//* And finally, $wrap in h1 if HTML5 & semantic headings enabled
	$wrap = genesis_html5() && genesis_get_seo_option( 'semantic_headings' ) ? 'h1' : $wrap;

	$wrap = apply_filters( 'genesis_site_title_wrap', $wrap );

	return $title;
}
Step 3 : Add the following CSS to your style sheet:
.site-title,
.site-description {
	display: block;
	height: 0;
	margin-bottom: 0;
	text-indent: -9999px;
}
Thats it!
Optional
Remove the PHP code from functions.php for the custom header.
// Add support for custom header.
add_theme_support( 'custom-header', array(
	'width'           => 600,
	'height'          => 160,
	'header-selector' => '.site-title a',
	'header-text'     => false,
	'flex-height'     => true,
) );
Other Options
Can also be coded this way:
add_filter( 'genesis_seo_title', 'add_logo_to_title' );

function add_logo_to_title( $title ) {

    $inside = sprintf( '<a href="%s">%s</a>', trailingslashit( home_url() ), the_custom_logo() );

	return $title;
}
Change the Custom Logo Link #
Here’s a filter function to change the link for the logo :
Leave a Reply
You must be logged in to post a comment.