
This custom tutorial request, written for a paid member, adds a widget area after the header with an image background.
The default image named after-header.jpg is uploaded to your child themes images folder. You can then change it using customize > Widget Background.
The tutorial also includes instructions, at the end of this post, on how to change the height of the image.
Demo Video
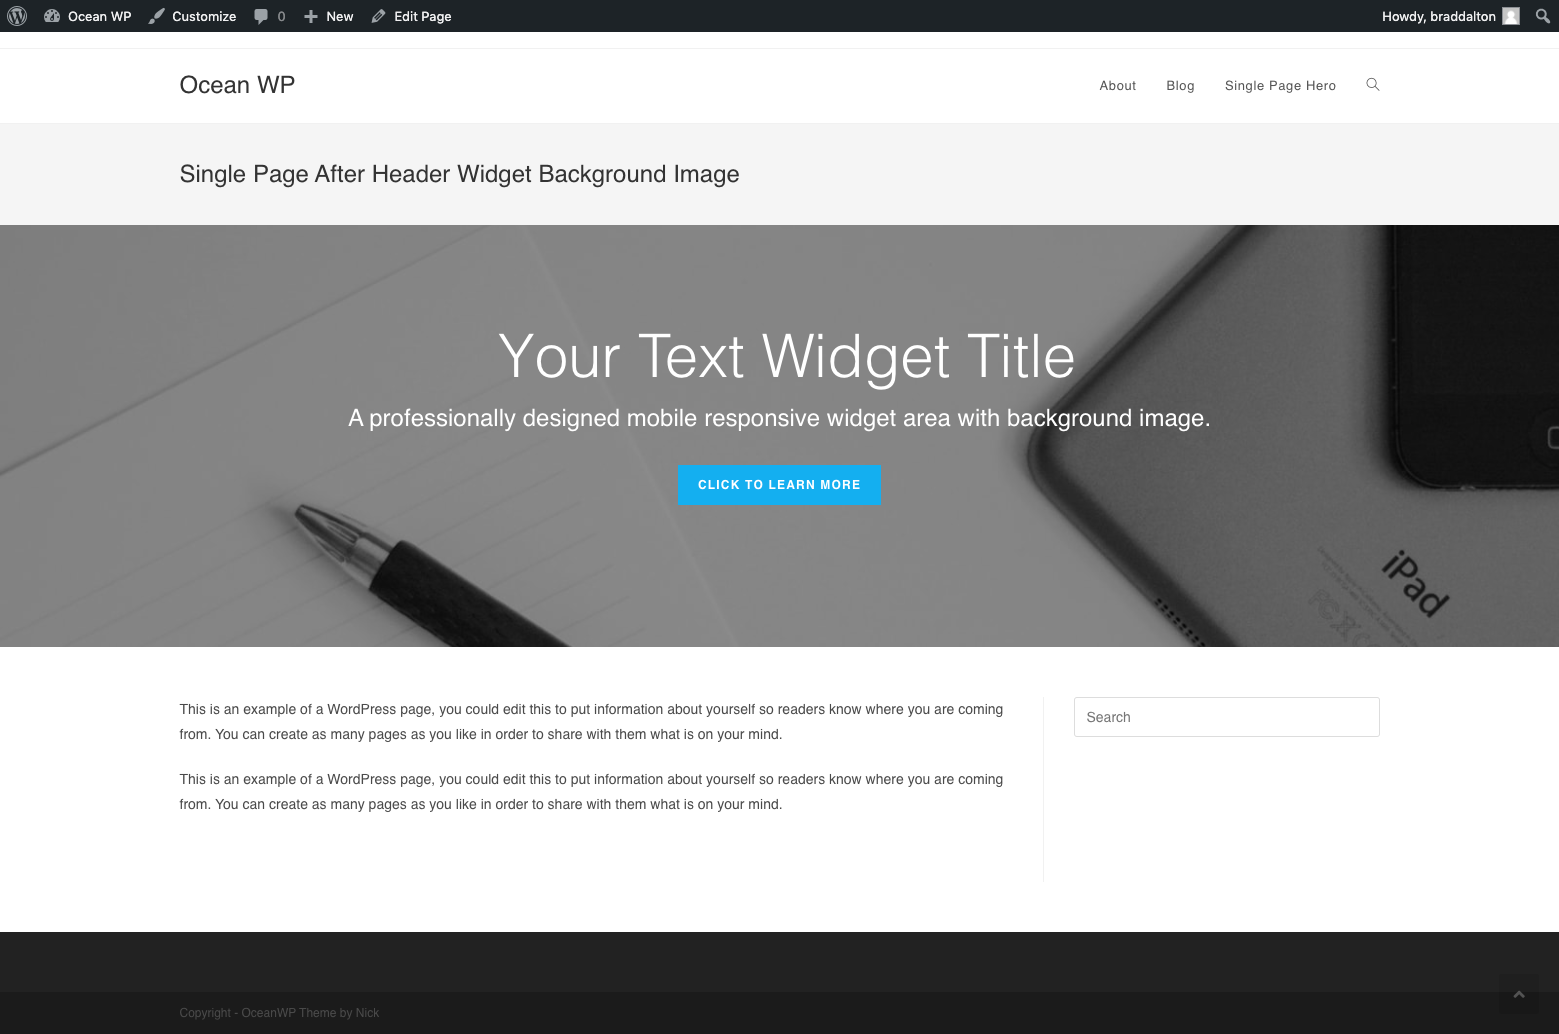
Shows the after header widget displaying text over the background image added via the customizer > Widget Background setting in the Ocean WP theme for WordPress.
Tested using the Ocean WP theme for WordPress, this tutorial can be used in any WordPress theme. If you’re using Genesis, use this version instead which contains Genesis hooks.
Installation Steps
- # Upload the lib & js folders to your child theme folder like this :
- # Copy & paste the PHP code from the functions.php file to the end of your child themes functions file.
- # Copy & paste the CSS from the style.css file to the end of your child themes style sheet and clear caching.
- # Copy & paste the PHP code between lines 43 – 49 in header.php to your child themes header.php file. To do this you may need to copy over your themes header.php file from your parent theme to your child theme. The PHP code should be pasted in the position you want to display the widget area. In this case, at the end of the header.php file so it displays after your header.
- # Upload your background image named after-header.jpg to your child themes images folder.


# Image Height
To reduce the height of the background image displaying behind your pages entry title, you can swap out the jQuery in after-header.js file located inside the after-header folder to this :
And change the 0.5 to adjust further. This will change the height by half.
Leave a Reply
You must be logged in to post a comment.