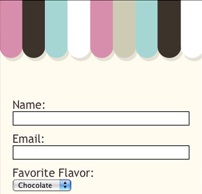
 In this post for beginners, i’ll show you a step by step tutorial how to install the Aweber web form plugin for wordpress. You’ll discover how easy it is to add web forms to your WordPress blog with the click of a button!
With this plugin, you’ll be able to start collecting subscribers from your blog visitors without having to log into AWeber – just choose the form you want to appear on your blog from your sidebar drop down menu in your widget area.
Simply drag and drop web forms that you have created in your AWeber email marketing account into your blogs sidebar, footer or any other area, without having to log into your AWeber account or copy and paste anything!
All you need is an AWeber account and a completed web form.
Learn More About AWeber Email Marketing
AWeber is an email marketing service that helps users build email lists and stay in contact with their website visitors, blog readers and customers. Take a look at what Aweber has to offer and get started with a brand new account for just a dollar.
This plugin provides a simple way to add an AWeber form to your sidebar and enable AWeber email web analytics for your website.
It gives you access to two “AWeber Mailing List” sidebar widgets that let you enter the subscription form’s details. These details are used to automatically display your AWeber email subscription form.
The settings page lets you enter your AWeber account id. Once entered, the AWeber web email analytics tracking code will be automatically enabled on all pages in your website.
No playing around with coding or template editing is required.
How To Install WordPress Aweber Web Form Plugin
If you have any trouble following the instructions below, check the Screenshots below for a visual step-by-step.
If you’re manually installing the widget as a .zip, make sure you upload it to “/wp-content/plugins/”. Once installed, activate it on your Plugins page by clicking the Activate link.
- To connect the widget to your AWeber account, first click AWeber Web Form under Settings on the left hand side of your WordPress dashboard.
- On this page, click the link next to “Step 1″.
- You will be taken to a page asking you to authorize the connection between your AWeber account and the widget. Enter your login name and password here and click the “Allow” button.
- You’ll be taken to a page with an authorization code – simply highlight it and copy it.
- Back in your WordPress dashboard, paste the authorization code into the field provided and click the “Make Connection” button.
- Once you’ve installed this widget and connected it to your AWeber account, head over to the Widgets page under Appearance on the left side of your WordPress dashboard (Backend).
- Drag the widget (it will show up under Available Widgets as “AWeber Web Form”) into the widget area in which you’d like your form to appear. You can drag it into the Primary area, footer, header and any other available widget area.
- Once the widget is in place, you can choose which form you would like to appear. Expand the AWeber Web Form widget’s options by clicking the arrow to its right, then use the drop down menus to choose the list you want to work with, and the web form you’d like to place on your blog.
- Then click the “Save” button and your form will be installed on all your blog pages.
Still Having Trouble?
If you don’t see any available web forms, make sure you’ve selected the right list.
If you’re in the list you want subscribers added to, but still don’t see a web form that you can add, you’ll need to log in to your AWeber account and create a web form first.
Screen Shots: Aweber Web Form Plugin Installation
Note: Please click the images to enlarge
Firstly, login to your wordpress backend (Dashboard) and find Plugins on the last hand side of your dashboard.
Click add new and type in Aweber into the search field and click search plugins.
Once you have found Aweber Web Form by Aweber, Click on install to install and activate your Aweber Web Form Plugin.
Scroll down to Settings on the left hand side of your dashboard and click on Aweber Web Form
AWeber Web Form Options
Step 1: Click to the link and enter your username and password and Click Allow Access to get your authorization code.
If you do not have a Aweber account, Sign up for a 3o day Free Trial of Aweber today for $1.
Step 2: Copy the code Paste in your authorization code into the empty box and Click Make Connection
Your successfully connected to your Aweber account .
Next step – go to the Widgets Page and drag the AWeber Web Form widget into your Primary Sidebar widget area or any other widget area where you want the Aweber web form to be shown.
You may elect to have several forms in different areas of your site.
The widgets area can also be found under Appearance on the left hand side of your dashboard
Now select the form you want to use and click save. You can use several forms on different sites if you like. You may not have designed your form yet so you will need to login to your Aweber account and start the process by first creating a new list etc.
In the next post i will show you how to build subscribers from your blog comments & registrations using Awebers new web form plugin & widget features.

Leave a Reply
You must be logged in to post a comment.