WP eCommerce was the first e-Commerce plugin ever developed for WordPress and therefore is the oldest.
I remember using it several years ago on an eCommerce website when i started learning about WordPress.
There’s 4 other eCommerce & shopping cart plugins for WordPress which are good enough to take a look at.
There’s even a list of the latest and greatest eCommerce themes which are specifically designed for selling products online however, this tutorial will focus on creating your own online shop for free.
In this tutorial you’ll learn how to setup your own eCommerce website, add products and sell physical & digital products online using the WP eCommerce plugin for WordPress.
Tools You’ll Need
- WP eCommerce plugin
- Twenty Eleven WordPress theme
You may use a different theme than Twenty Eleven if you want.
Install WP eCommerce Plugin
Download the plugin or type the name into the search box and install it under Plugins > Add New > Search Plugins.
Setup Steps
There’s 2 main parts to setting up WP eCommerce.
- Configuring the settings to your own situation
- Adding your products
General Store Settings
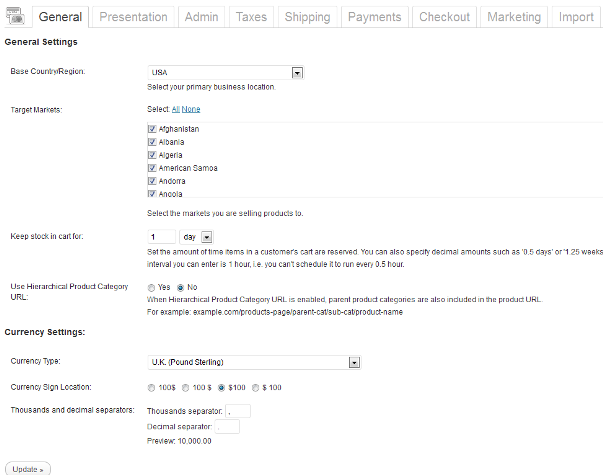
The admin and settings for WP eCommerce is very well laid out with one tab on the left sidebar for Products and all the other Store Settings on the top of the settings screen.
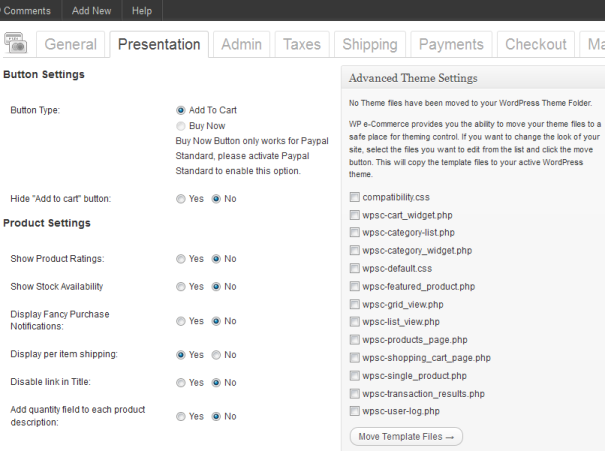
Presentation Settings
Here you can configure these settings to your own situation
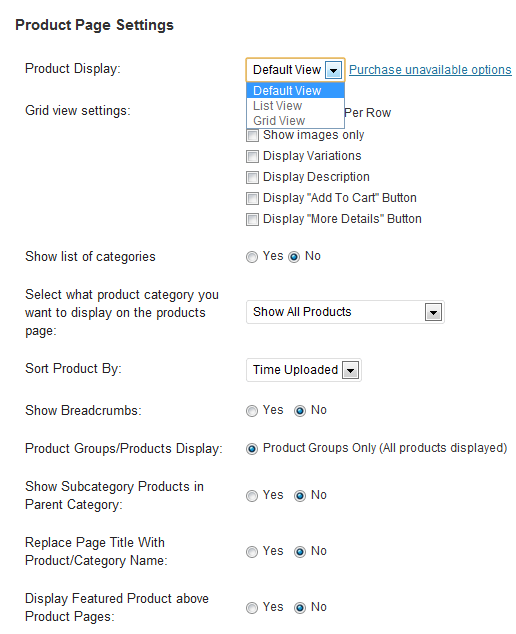
Product Page Settings
GetShopped.org offer a range of premium upgrades which you can use to display your products in a List or Grid view. When your prospective customers click the product thumbnail they are taken to the individual product page which contains more information and a larger image of the product.
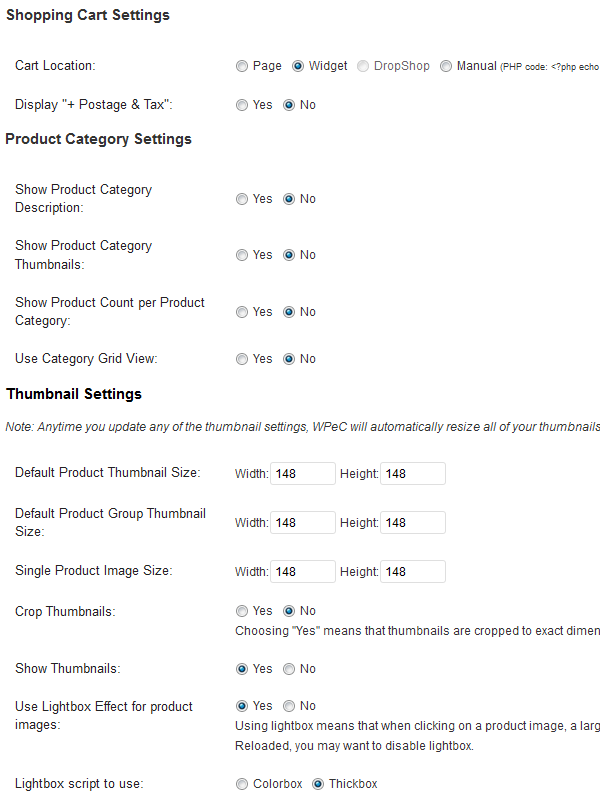
Shopping Cart, Product Category & Thumbnail Settings
Here you can set the display area for your shopping cart, group your products into categories and set the size of your product thumbnail images.
If you choose to use the lightbox effect, your images will pop up in a nice lightbox for closer inspection when clicked.
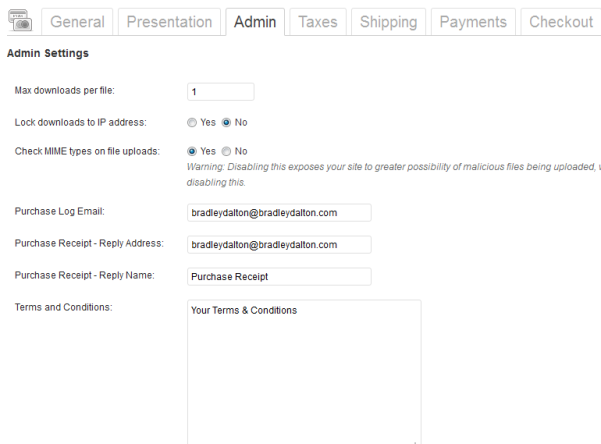
Admin Settings
Here you’ll need to setup a few extra email accounts and add your terms & conditions. Its more professional if the email addresses are setup specifically for the purpose they will be used for than using your own personal email addresses for all functions.
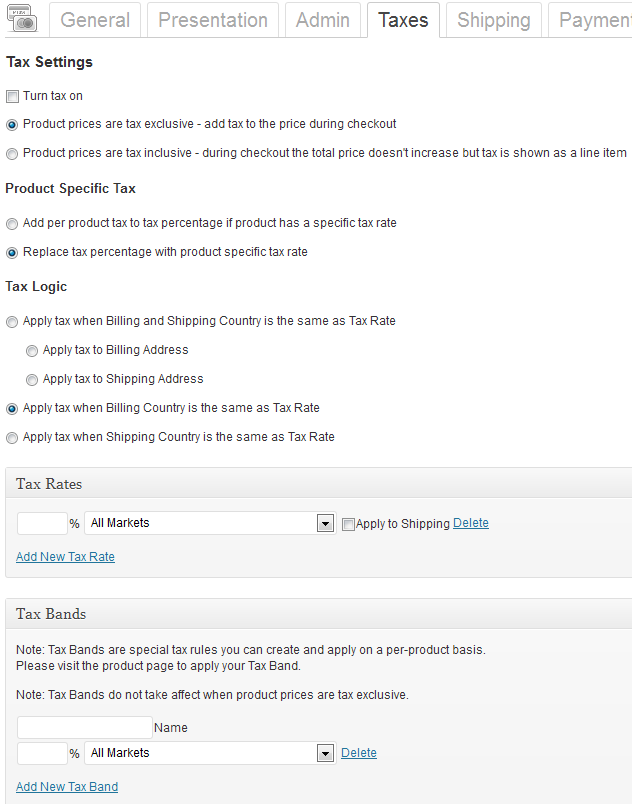
Tax Settings
Doesn’t it feel great being the taxman and collecting taxes! If you’re required to collect tax like GST or Sales tax then you simply add the percentage % and WP eCommerce calculates the tax. You can also apply tax to specific products from specific countries.
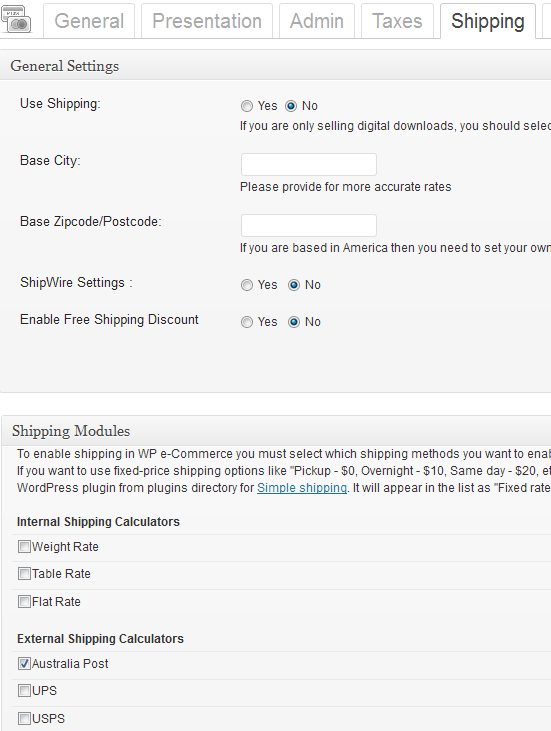
Shipping Settings
You can disable these settings for electronic goods. Physical goods can be shipped using different rates including a flat rate, a rate depending on weight or rates used from a table you upload.
Other external shipping rates can be used,for example: UPS and Australia Post
wpsc-simple-shipping plugin enables free input for fixed rate shipping options.
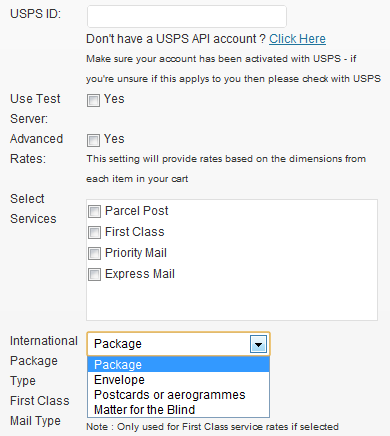
USPS Shipping Module
Enter your USPS API account details to connect to USPS for shipping. Don’t have a USPS API account ? Click Here
Payment Settings
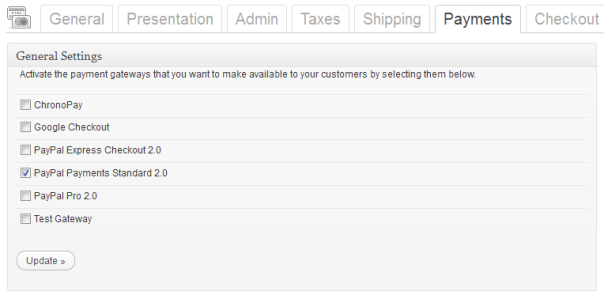
Paypal or Google Checkout are recommended for collecting and managing payments. To configure payment settings you’ll need to click edit next to the setting you have checked.
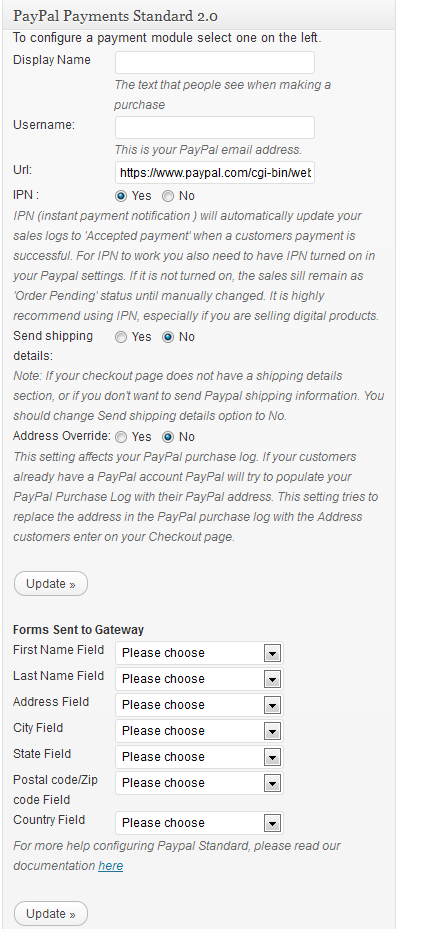
PayPal Payment Settings
This is an example of the PayPal payment settings screen. You can collect full personal details including address if you wish.
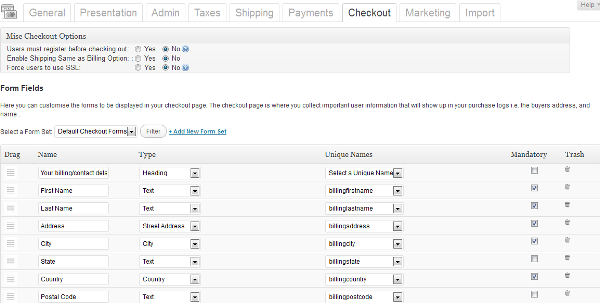
Checkout Settings
Here you can request your buyers register before checking out. If you do this, you need to also enable the ‘anyone can register’ option under General Settings.
If you are selling physical products then these settings are very important for delivery however you would only use the name settings for digital product sales and delivery.
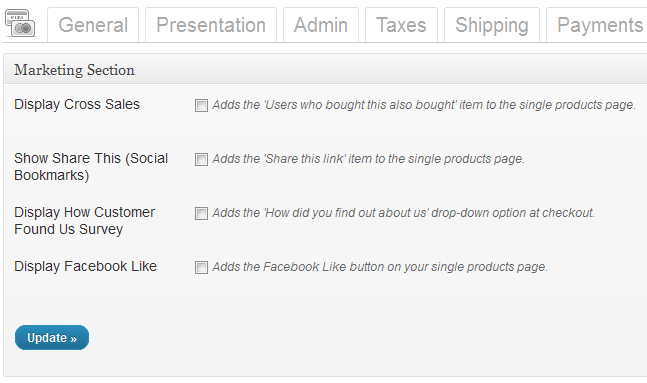
Marketing Settings
Here’s you’ll find some very important settings to help you increase and close sales.
Google Product Search
Here you can add your products with images into the Google Merchant Centre so that they appear within Google Product Search results.
Import Settings
You can import your products from a comma delimited text file. An example of a csv import file would look like this:
Description, Additional Description, Product Name, Price, SKU, weight, weight unit, stock quantity, is limited quantity
Conclusion
I’ll report on the Product Settings and features in my next post as well as a detailed report on adding products. Overall WP eCommerce is a very good full featured script which covers all bases and is recommended for eCommerce Sites or full page eCommerce.
If you’re only selling 1 or 2 products then you’d be better off with a simple shopping cart plugin or gravity forms PayPal integration.
You could also simply add Paypal button code directly in the WordPress HTML editor or even use the Paypal email link using a standard HTML link from your product.
Note: Unfortunately, the support for WP eCommerce isn’t the best unless you upgrade to premium support. They do offer a full time staff for the premium forum so you may need to consider this if you might need support for a free plugin.
Other Options
If you’re familiar with WordPress i suggest you take a look at Woo Commerce.
The major advantages of using Woo products are that they’re all made by the same team of developers and integrate together perfectly.
You can simply:
- Choose an eCommerce theme depending on what type of appearance and styling you want
- Install the Woo Commerce plugin which is very user friendly
- Add the specific extensions you need for payment & shipping options
This is the best choice if you want to make an online shop yourself as its not expensive and Woo Commerce offer all the tools you nee to complete the job easily.
Woo Commerce even integrates with the Genesis framework and StudioPress themes who have created a special free plugin to handle the heavy lifting.

Leave a Reply
You must be logged in to post a comment.