
You can choose between moving WordPress manually or using a plugin to move your site to your live server.
Lets take a look at moving WordPress manually using a plugin only to export the database from the local installation.
In this tutorial we’ll:
- Install WP Migrate DB plugin & add domain and live server path
- Create a New Database
- Import your local servers database file using phpMyAdmin
- Upload your WordPress files to your server
- Edit wp-config.php file
- Point your name servers to your web host
Requirements
Change site URL & server path
The first step is to install the WP Migrate DB plugin and add your domain name along with the new server path to your public_html root directory.
Finding your public_html root directory.
In cPanel, go to File Manager and you’ll find these details:
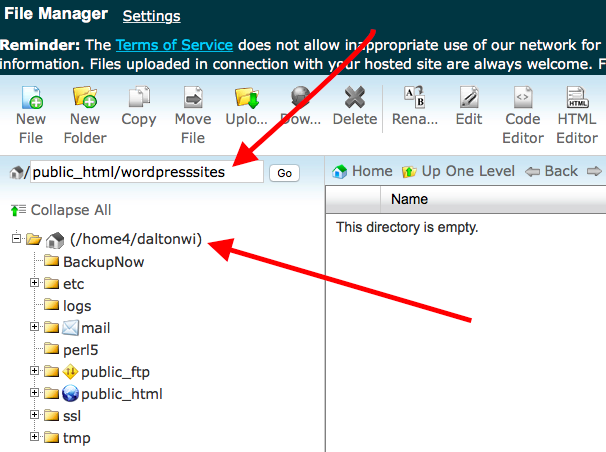
The above example shows you the full path to the folder named wordpresssites which sits in the public_html root directory as a add-on or subdomain. In this case, the full path you need to add in the WP Migrate DB plugins migrate settings is:
/home4/daltonwi/public_html/wordpresssites
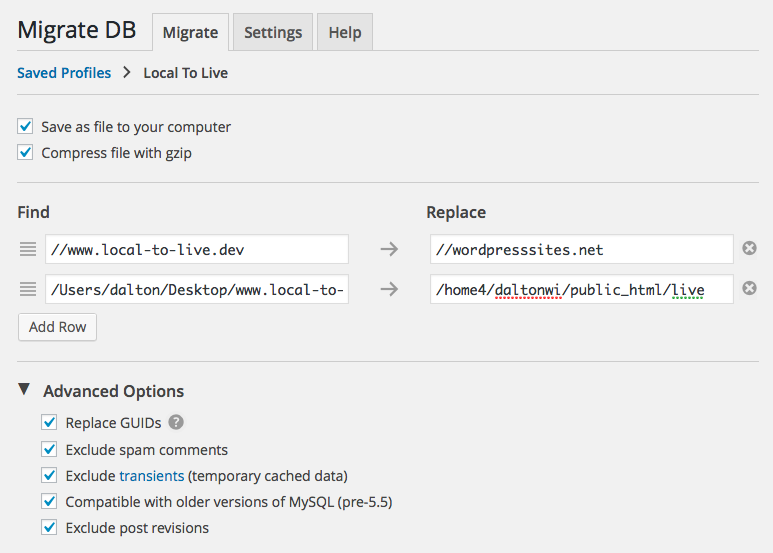
Example of migrate settings with domain name and live server path:
The following image shows you the server path if using a addon or subdomain named live
Once you have the migrate settings figured out, export your local DB and save it to your desktop.
Create a New Database On Your Live Server
Follow this tutorial on how to create a new database for WordPress.
Import Your Local Servers Database To Your Live Server
Login to PHPMyAdmin using cPanel on your live server.

Click the database you created for your new site and click import to import the database you exported from your local severs PHPMyAdmin.

Note: If you have already installed WordPress on your live server without adding any content, drop all the tables using PHPmyAdmin before you import your local database. In this case you only need to upload the wp-content folder from your local installation.
Upload WordPress files to server
You can upload all your WordPress files to your live server or install WordPress on your live server and only upload your wp-content folder containing your uploads, themes and plugins. The only file you will need to edit is your wp-config.php file with your new database name, username and password.
Edit wp-config.php file
You will need to change the database configuration settings in wp-config.php file. You can do this before you transfer your files to your live server or afterwards.
You should have taken note of your new database settings when you created a new database.
Here’s a tutorial on how to edit your wp-config.php file which will connect your database to your site
Point Your Domains Name Servers To Your Web Host
If your domain manager is NOT the same as your web host, you will need to edit your DNS – Domains Name Servers so they point to your web host. Generally when you sign up for a new hosting account, you should receive a welcome email with the nameserver settings for that host.
Here’s a video on how to change your DNS (Domains Name Servers)
Leave a Reply
You must be logged in to post a comment.