This tutorial is part of a series created for Kolakube users who have skins installed on the Thesis framework.
How many times have you visited a site and not been able to find the content you need?
Searching for quality information and solutions that solve problems is half the battle.
We all have our favorite sites knowing they contain quality solutions but digging into old articles and tutorials isn’t much fun.
Another hurdle is the default WordPress search function.
Its just NOT accurate.
A far better solution is to create your own Google custom search box and add it to your site.
I use it on my own site dozens of times a day and its very accurate, saves heaps of time and its free.
* The first 3 Google custom search results include ads unless you pay them $100 to remove the ads.
I even use Google custom search for internal linking as it ONLY searches this site.
One of the best places to add your search box is in your nav menu or header. This way its always above the fold which makes it easy for your readers to find content they are looking for.
In this tutorial, i’ll show you how to add your own search box to your nav menu.
Enable Search Box
Go to Thesis > Marketers Delight > Design Options > Main Menu > Enable Search Box
Customize Your Search Box
First step is to go to Google and make a custom search box.
- You can customize the colors to match the existing look and feel of your site
- You can also customize where you want the results to display, on your site, in your sidebar or even hosted on Google’s domain
- Include only the site url’s you want in your search results or include the entire web
You’ll need to remove the 100% width from the first line of your code
<div id="cse" style="width: 100%;">Loading</div> Change to this <div id="cse">Loading</div>

Also, don't copy any of the css code, meaning anything below the script tag is left out
</script>
Edit Your Theme’s Functions File
Next step is to remove the default search box function and replace it with your custom code.
Caution: Always backup your file before editing
You’ll find the code which needs replacing on or around line 388 in your md_functions.php file
Simply highlight this code and paste in your Google custom code over the top
Here’s what mine looks like.
<div id="cse">Loading</div>
 <script src="http://www.google.com/jsapi" type="text/javascript"></script>
 <script type="text/javascript">
 google.load('search', '1', {language : 'en', style : google.loader.themes.V2_DEFAULT});
 google.setOnLoadCallback(function() {
 var customSearchOptions = {}; var customSearchControl = new google.search.CustomSearchControl(
 '016091704141234512345:abcde7t3xjm', customSearchOptions);
 customSearchControl.setResultSetSize(google.search.Search.);
 customSearchControl.draw('cse');
 }, true);
 </script>
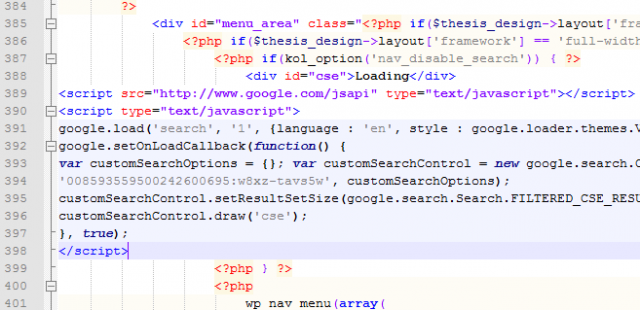
Your md_functions file should now look something like this
Add CSS Code
Next step is to add some CSS code to your custom.css file editor
.custom #cse {
float: right;
margin-top: 1.2em;
width: 250px;
}
.custom .cse .gsc-control-cse, .custom .gsc-control-cse {
background: none;
padding: 0;
border: 0;
}
.gsc-input-box {
border-radius: 4px;
}
Don’t forget to clear your browser cache and any caching plugins you have installed.
Support
Kolakube forums provide excellent support for customization and coding.
Thanks to Sean Davis for the CSS code.


Leave a Reply
You must be logged in to post a comment.