 Adding images to your blog or website is a great way to paint the picture and get your message understood. You can add different forms of media like images/pictures, video and audio to your blogs content using the media buttons located above your editor.
Here’s what we’ll take a closer look at in this post:
- Adding & Inserting Images
- Edit Existing Image
- Edit New Image
- Advanced Image Settings
- Image Details
- Image Options
- Image Alignment
- More WordPress Media Resources
![]()
You can choose from a range of different locations to upload your media files from:
- From Computer

- From URL
- Gallery
- Media Library
- NextGEN Gallery
Adding & Inserting Images
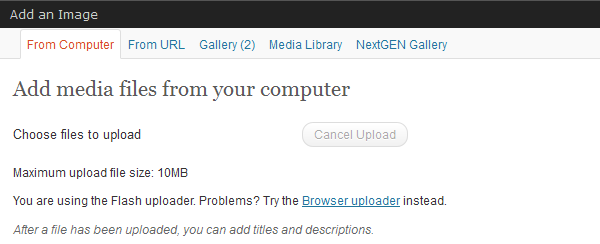
When uploading images to WordPress you can choose from either the Flash uploader or Browser uploader. 10mg is the file size limit if using WordPress otherwise you can upload any size using FTP or cPanel. You can also insert images which have not been uploaded to your WordPress site by inserting the URL of the image regardless of which server it is hosted on.
![]()
If the image has already been uploaded to your Media Library or Gallery, you can also insert these images into your content easily.
WordPress also offer a range of different options you can choose from once you have uploaded and inserted images and other forms of WordPress Media into your posts or pages:
Edit Existing Image
If you want to edit your image before you insert it and even after you you have inserted it into your post simply click Edit Image. If the image has already been inserted/embedded into your post, click the image and click on the tiny image window next to the delete button on the image to edit it.
Edit New Image
WordPress offer you several options to choose from when editing new images only. They are:
- Scale Image
- Crop Image
- Change aspect ratio
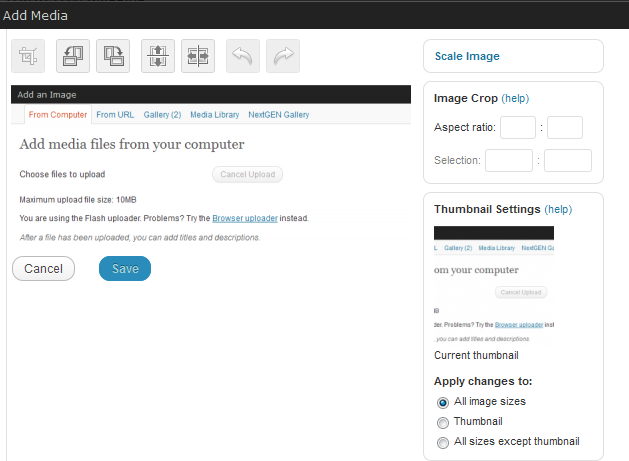
Other image editing options available for new images are:
Crop
Rotate Counter Clockwise
Rotate Clockwise
Flip Vertically
Flip Horizontally
Undo
Redo
You can also Apply changes to:
- All image sizes
- Thumbnail
- All sizes except thumbnail
Advanced Image Settings
Here you can easily change the width and height of your images by percentage % or editing the exact dimensions you require by editing the size.
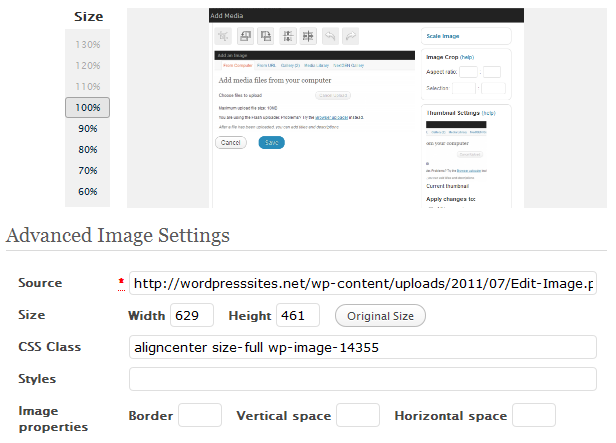
On the left hand side of this image you will see the size adjustment by percentage % and also the Width and Height settings which can be edited to your needs. CSS and styling options are also available for adding and editing.
Image Details
WordPress offer the following image details on each image uploaded to your site:
- File Name (Try and use a name which is a keyword related to your content)
- File Type (PNG Format is the best)
- Upload Date
- Dimensions
Image Options
Each image gives you the option to add the following:
- Title (Use a Unique & Descriptive Title Here)
- ALT Text (Add text which will be read by the search engines and also if the image doesn’t display here)
- Caption ( Add a caption if you want some text to display within the image)
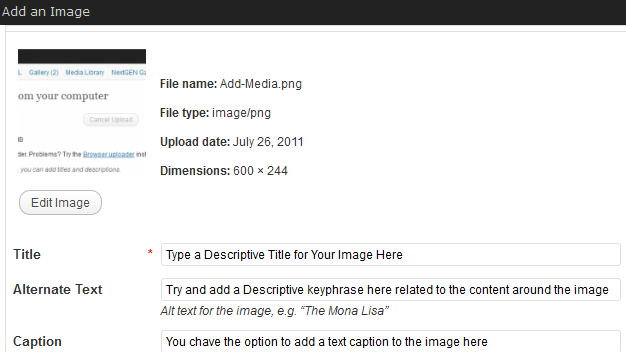
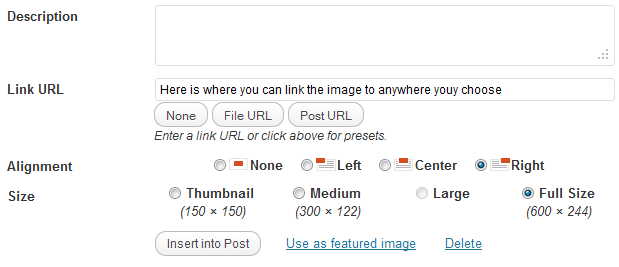
Other options available for your images are:
- Description
- Link URL
- Alignment
- Size
You can either insert the image into a post/page or use it as a featured image.
Image Alignment
WordPress offer several image Alignment options to choose from when your are inserting your uploaded images into a page or post. You can also edit these options after an image has already been inserted.
- None – This will insert your image on the left side of your page/post without any text wrapping around your image.
- Left – This will insert your image to the left and wrap text around the image
- Centre – This will insert your image into the centre of your page/post depending on where you place your mouse pointer when inserting. No Text will be wrapped around your image
- Right – This is insert your image to the right side of your post/page and wrap the text around your image.
I hope this gives you a general overview of WordPress Image options and the different options you can play around with. There’s much more to learn about Media and images which i’ll discuss in future posts.

Leave a Reply
You must be logged in to post a comment.