
In this tutorial, i’ll provide all the working code which you can use to display the Generate Box after all single posts. This post includes the code to add the box full width and also for the width of the content area only.
The tutorial assumes you have the Generate theme by StudioPress installed and doesn’t apply to using the Generate Box plugin on other themes.
The first step is to follow these setup instructions on the StudioPress website.
Another option is to use the Genesis eNews Extended plugin rather than pasting form code into a text widget.
Display Box Full Width
To display the box full width after single posts, simply add this code at the end of your child themes functions.php file.
add_action( 'genesis_after_content_sidebar_wrap', 'add_generate_box_after_single_posts', 5 );
function add_generate_box_after_single_posts() {
if ( is_single() && is_active_sidebar( 'generate-box' ) ) {
echo '<div id="generate-box"><div class="wrap">';
dynamic_sidebar( 'generate-box' );
echo '</div><!-- end .wrap --></div><!-- end #generate-box -->';
}
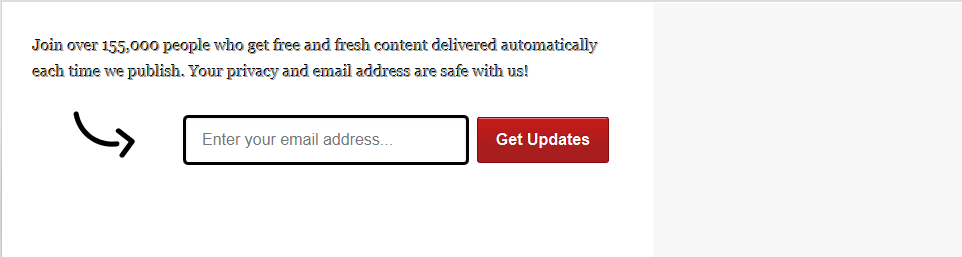
}This is how it will look after adding the above PHP code and some text to the eNews widget.
The next step is to add the dark background which displays after the home page header by default.
Add this code to the end of your child themes style.css file:
.single #generate-box .wrap {
background: url("images/generatebox-bg.png") repeat-x scroll center top #212121;
border: 1px solid #FFFFFF;
box-shadow: 0 0 2px #999999;
clear: both;
color: #9F9F9F;
margin: 2px auto 0;
min-height: 195px;
padding: 30px;
text-shadow: -1px -1px #000000;
width: 898px;
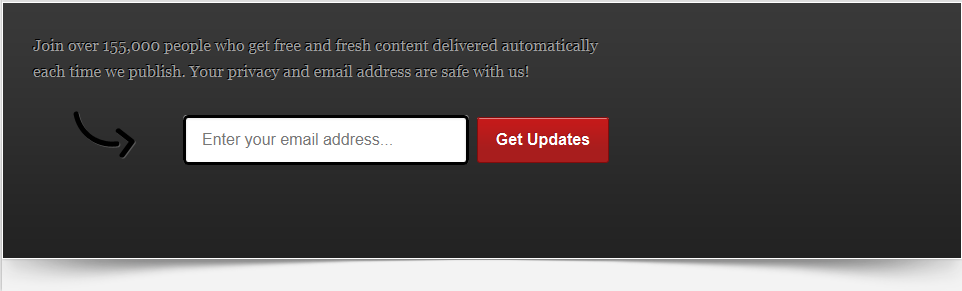
}This is a good time for you to modify the CSS code to your own styling preferences.
This is how the box will look after adding the above CSS code.
The next steps are optional however i think you may like to remove the shadow under the box. If so, paste this code at the end of your style.css file.
#generate-box {
    background: url("images/shadow.png") no-repeat scroll center bottom #F3F3F3;
    padding: 0 0 0px;
}
This is also another good time to modify the CSS code to your own liking.
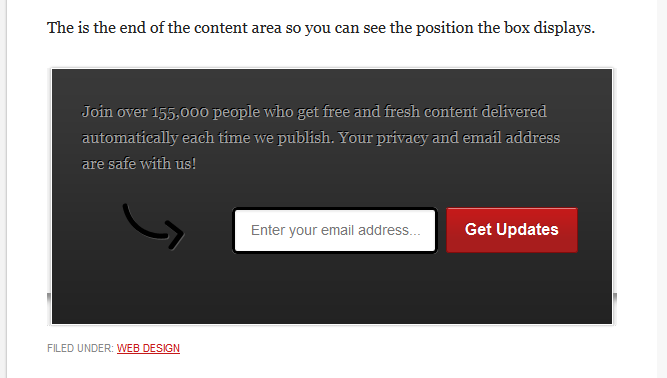
Here’s what the box looks like now with the footer included in the image and the shadow removed:

Display Content Width Only
First step is to add this PHP code to the end of your child themes functions.php file:
add_action( 'genesis_after_post_content', 'add_generate_box_content_width', 5 );
function add_generate_box_content_width() {
if ( is_single() && is_active_sidebar( 'generate-box' ) ) {
		echo '<div id="generate-box"><div class="wrap">';
		dynamic_sidebar( 'generate-box' );
		echo '</div><!-- end .wrap --></div><!-- end #generate-box -->';

		}

}
The next step is to add all the CSS code included for the full width version as well as this code to your child themes style.css file:
.single #generate-box #mce-EMAIL,
.single #generate-box input[type="text"] {
	-moz-border-radius: 5px;
	-moz-box-shadow: inset 0 1px 2px 1px #eee;
	-webkit-border-radius: 5px;
	-webkit-box-shadow: inset 0 1px 2px 1px #eee;
	background-color: #fff;
	border: 3px solid #000;
	border-radius: 5px;
	box-shadow: inset 0 1px 1px 1px #eee;
	color: #777;
	font-size: 14px;
	padding: 12px 15px;
	width: 175px;
}
That’s it!
The 2 code snippets above simply change the hook position so the box displays only the width of the content area and reduces the size of the submit button so its inline with the email input box.
Here’s the result:
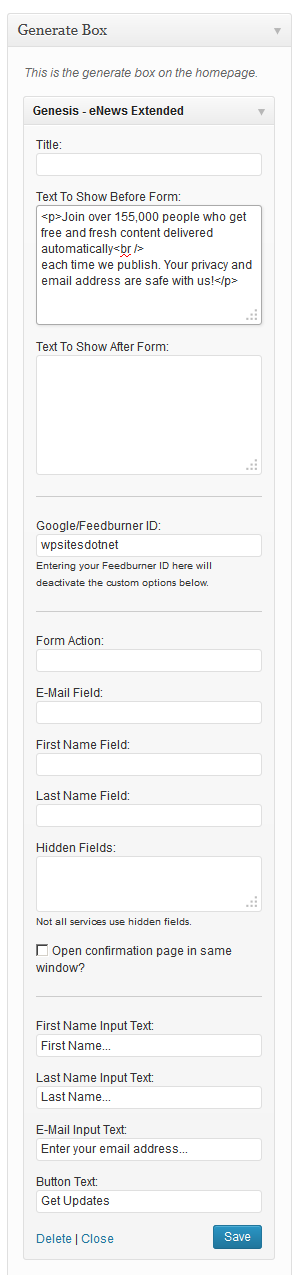
Genesis eNews Configuration For The Generate Box
These are the settings i used with the content you see in the screenshots.
I didn’t add the image for the badge or the header ribbon.
Removing The Generate Box From Home Page
You may want to remove the box from the home page however it will not be effected by the styling for your after post box as i have added the single post class .single to all the CSS code.
Simply remove this code from your home.php file inside the Generate themes folder:
/** Add Generate Box after header **/
add_action( 'genesis_after_header', 'generate_box', 10 );
function generate_box() {

	if ( is_active_sidebar( 'generate-box' ) ) {
		echo '<div id="generate-box"><div class="wrap">';
		dynamic_sidebar( 'generate-box' );
		echo '</div><!-- end .wrap --></div><!-- end #generate-box -->';
	}

}
Using The Generate Box On Other Themes
You could grab all the code from the Generate themes files and add this box to any theme. All you need to do is modify the width for the background image and tweak the CSS code a little.
Another option is to install the Generate Box plugin and change the hook in the plugins include > box.php file to the after post position. You will also need to add the conditional tag for single posts.
Other Options
Prefer using the eNews widget on its own?
Here’s a post about styling the eNews widget differently to the default style.
And you might find this post which includes 5 ways to code after post widgets in Genesis useful.
Leave a Reply
You must be logged in to post a comment.