
This download folder contains 3 files which enable you to add a full width hero image behind your site header which also contains your menu like this :

The hero is only activated once the hero widget is populated.
By default, the same image displays across all page types however you can add a unique image to any single post/page using WordPress custom fields and/or ACF fields.
Any content you add to the Hero widget area floats over your hero image.
Demo Video #
Shows the default hero image displaying behind the site header and the unique hero image, added using a ACF image field displaying when added. Shows the site header background color changing from transparent to white on scroll.
You can change the default hero image using customize > Hero Image.
Installation Steps #
There’s 4 steps :
Step 1 – Upload the hero.js file to your Genesis Sample themes root directory.
Step 2 – Copy & paste the PHP code to the end of the Genesis Sample themes functions.php file.
Step 3 – Copy & paste the CSS to the end of the Genesis Sample themes style.css file and clear caching.
Step 4 – Add a widget with your content to Appearance > Widgets > Hero Text. Without this widget area active, the code will NOT execute. Also, your image will not display unless you add it via customize > Hero Image.
Optional – Unique Hero Images
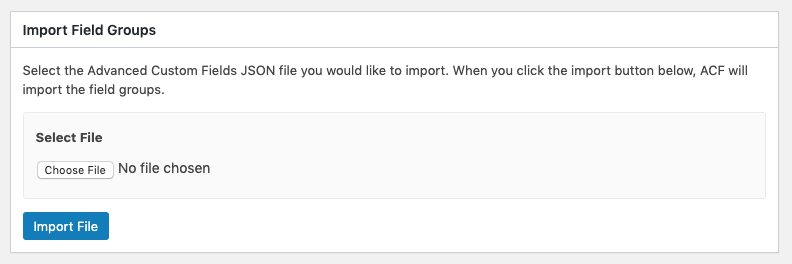
If you want to display unique images on single posts and pages, install the Advanced Custom Fields plugin and import the acf.json file using Custom Fields > Tools > Import File as seen in this screenshot :
Leave a Reply
You must be logged in to post a comment.