
One of the greatest things about WordPress are the widgets.
The only problem is, many people want a widget area which isn’t already included in their theme.
So how easy is it to create a widget area anywhere in WordPress?
It depends on which theme you are using. Its easier to add a widget area in WordPress if you’re using a theme framework like Genesis than it is if using one of the default themes.
The reason for this is that premium frameworks are built with customization in mind and include a list of hooks which you can use to display content in different locations.
Check out all the hook locations for Genesis theme users.
Lets go through the simple process of adding a custom widget area anywhere in WordPress.
- We’ll register the new widget
- Then hook the new widget to any of the Genesis theme hook locations
1. Register New Widget
All you need to do is add some php code to your child themes functions.php file.
genesis_register_sidebar( array(
'id' => 'custom-widget',
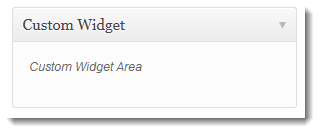
'name' => __( 'Custom Widget', 'genesis' ),
'description' => __( 'Custom Widget Area', 'childtheme' ),
) );This code simply creates the new widget which is displayed in your Widgets page and includes:
- A unique i.d – You can use this as the selector to style your new widget
- A name for your new widget – Displayed in the Widget on the widgets page
- A description for your widget – Displayed in the Widget on the widgets page
This is what you’ll see in your Widgets page after adding this code to your theme.
So now you’ve added a new widget with a unique name and description, its time to hook the widget into any hook location.
2. Hooking In Your New Widget
Once you have an idea on where you want the widget to hook into, its simply a matter of adding the hook to your custom function.
Here’s some code you can place in your child themes functions.php file.
This code uses the genesis after header hook so any widget you drag into your new custom widget area, will display after the header.
add_action( 'genesis_after_header', 'add_genesis_widget_area' );
function add_genesis_widget_area() {
                genesis_widget_area( 'custom-widget', array(
		'before' => '<div class="custom-widget widget-area">',
		'after'  => '</div>',
    ) );

}
You can change the hook in this code to display your widget content in most hook locations.
Styling Your Widget
Now that you’ve registered your widget to output in one of the Genesis hook locations, you might want to add some styling to your new widget.
The class you use for this has been created when you added the custom function which you can see in the code above being the same as the i.d you used when registering the widget in step 1.
class="custom-widgetIn this case its custom-widget so the CSS code you can add to your child theme style.css file would look something like this:
.custom-widget {
    background-color: grey;
    margin: 5px 0 10px;
    padding: 10px;
    overflow: hidden;
}
You can add other CSS properties and change the values for each property to suit your own theme design.
Add After Post Widget Area In Genesis
Here’s a tutorial i wrote earlier about how to create a widget area after your post content.
This tutorial also shows you how to use the Simple Hooks plugin to display content in any hook location Genesis offers rather than creating a widget for that location.
It also includes information on how to use conditional tags to display your widget content based on specific conditions being met.
Displaying Widget Based On Conditions
Once you’re comfortable adding custom widget area’s in Genesis, you might want to learn how to display the widget content based on conditions.
To do this, you’ll need to add conditional tags to the functions code you used to display your widget in a hook location like this :
add_action( 'genesis_after_header', 'add_genesis_widget_area' );
function add_genesis_widget_area() {
if ( is_page('1') ) {
    genesis_widget_area( 'custom-widget', array(
    'before' => '<div class="custom-widget widget-area">',
    'after'  => '</div>',
    ) );
    }
}
In this case is_page('1') controls where he custom-widget displays which will be the page with a i.d of 1. You can find the page or post I.D in the source code of the page or by hovering over the MOver to trash link.
Leave a Reply
You must be logged in to post a comment.