You probably already know that WordPress creates 4 images for every one you upload.
The image sizes WordPress creates depends on:
- The size of the original size of the image you upload
- And the image sizes you choose in your media settings
So what size should you use when configuring your Media Settings?
If you’re new to WordPress, you may find this basic introduction to using images in WordPress useful before reading on.
Lets take a look at how you can match your media settings to your child themes image sizes.
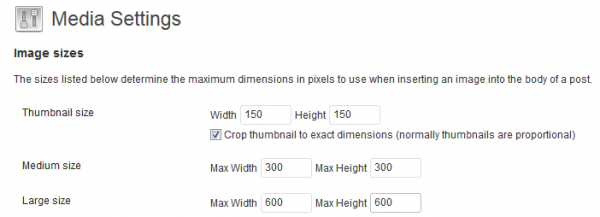
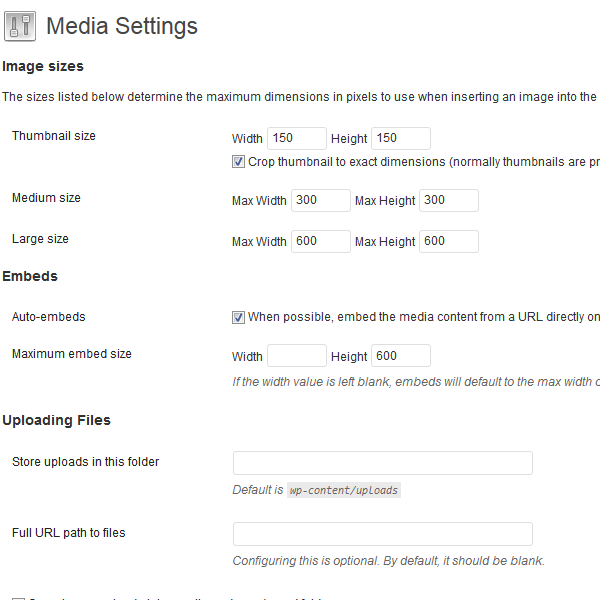
Media Settings

The sizes you configure in your media settings doesn’t guarantee WordPress will create images according to these sizes.
Uploading Any Image Size
1st Example:
On my test site, the image settings are exactly as above.
I’ll upload 2 images:
- The first is 702 width x 254 height
- The second is 600 x 600
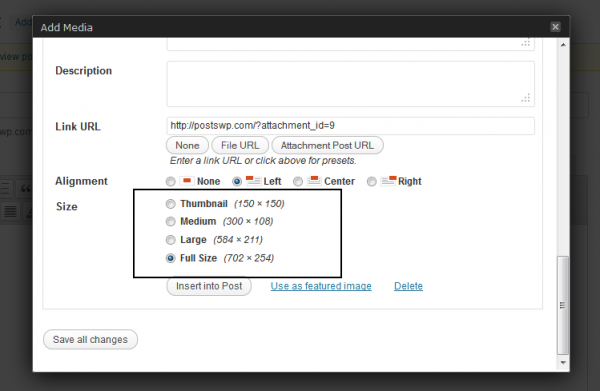
These are the image sizes you get to choose from when you go to insert an image of this size into a post based on the above settings:

They’re not the same as you configured in your Media Settings.
Why?
Because the image uploaded wasn’t the same size and has a different aspect ratio.
So how do you make sure WordPress creates images based on your media settings?
Crop Images Before Upload
2nd Example: 600 x 600

In the second example the image is cropped so that its the exact same size as the large image size which has been configured in the Media Settings page.
The full size will match the original image size you upload to your media library. The other sizes relate to the settings you configure in your Media Settings.

This results in a better quality image being displayed because its not being resized by WordPress.
Themes Image Sizes
You may want to configure your Media Settings so they match your themes image sizes.
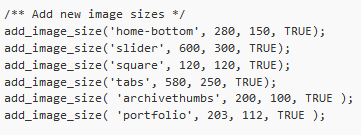
You can go to your child theme’s functions.php file and find out what your themes image sizes are:
Go to Appearance > Editor > Themes Functions
The image sizes you find here are created every time you upload an image however they aren’t displayed on the insert image screen unlike the sizes you configure in your Media Settings.
Displaying Custom Image Sizes Add Media Screen
- You can install a plugin which will include these image sizes on your add media screen and Media Settings page.
- Another option is to add some custom code to your child theme’s functions.php file. Read more here
Child Themes Functions.php Example:

I’ve added a couple of custom image sizes in the above screenshot for archive thumbs so the aspect ratio is the same as the slider images:
Example: archivethumbs
Slider image size is: 600 x 300
Blog page thumbnails are: 200 x 100
This way the slider images are resized to exactly a third of the original size for the blog page archives therefore the best quality.
Tools
The tools i use to edit images are listed in my toolbox. They are:
- Awesome screenshot – This free browser extension enables you to measure the size of your screenshots before you take them. Clearly this is helpful when you want to achieve the best quality images to up-load into your WordPress site.
- Miscrosoft Picture Manager – You’ll find this tool already included on your local computer if you’re running Windows.
- Paint.net – Use this web design software for creating featured images for the slider.
Conclusion
Its a good idea to crop your images before uploading them if you want to achieve the best quality. Otherwise, you can upload images with the best aspect ratio so you get the best quality when they are resized according to your Media Settings & the image sizes your themes uses.


Leave a Reply
You must be logged in to post a comment.